Difference between revisions of "Tracks"
From LFS Manual
Jump to navigationJump to search (Edited out the sections that already have their own pages) |
m (Fixed links) |
||
| (54 intermediate revisions by 19 users not shown) | |||
| Line 3: | Line 3: | ||
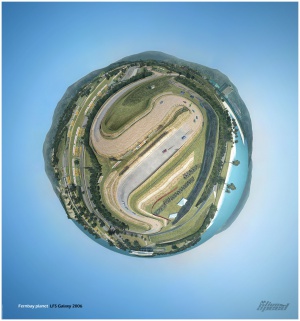
[[Image:Fernbay-planet.jpg|thumb|Planet Fern Bay by KiDCoDEa and DoN]] | [[Image:Fernbay-planet.jpg|thumb|Planet Fern Bay by KiDCoDEa and DoN]] | ||
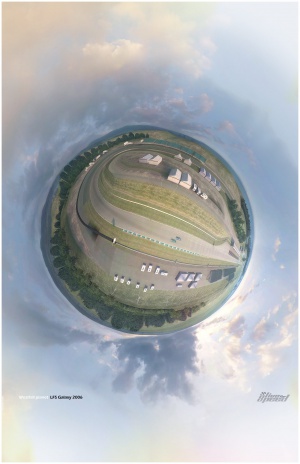
[[Image:Westhill-planet.jpg|thumb|Planet Westhill by KiDCoDEa and DoN]] | [[Image:Westhill-planet.jpg|thumb|Planet Westhill by KiDCoDEa and DoN]] | ||
| − | |||
| − | |||
| − | |||
| − | |colspan=" | + | == S1 Tracks == |
| + | {| border="0" style="border: 1px solid #000000; background-color: #FAFAFA;" width="500" | ||
| + | ! colspan="5" style="background-color: #0066CC; color:#FFF;" |'''S1 tracks''' | ||
| + | |- style="background-color: #DFDFDF;" | ||
| + | ! style="border: 1px solid #000000;" | Track | ||
| + | ! style="border: 1px solid #000000;" | Circuit | ||
| + | ! style="border: 1px solid #000000;" | Abbrev | ||
| + | ! style="border: 1px solid #000000;" | Length | ||
| + | ! style="border: 1px solid #000000;" | Grid Size | ||
|- | |- | ||
| − | + | | style="border: 1px solid #000000; background-color: #DFDFDF; text-align: center;" rowspan="4"|[[Blackwood|<span style="font-size: 20px; font-weight:bold;">BL</span><br />Blackwood]]||[[Blackwood#GP Track|GP Track]]||BL1||3.297 km (2.048 mi)||40 | |
| − | |||
| − | |||
| − | |||
|- | |- | ||
| − | | | + | |[[Blackwood#Historic|Historic]]||BL2||3.294 km (2.047 mi)||40 |
|- | |- | ||
| − | |Rallycross|| | + | |[[Blackwood#Rallycross|Rallycross]]||BL3||1.838 km (1.142 mi)||40 |
|- | |- | ||
| − | |Car Park|| | + | |[[Blackwood#Car_Park|Car Park]]||BL4||N/A||40 |
|- | |- | ||
| − | |rowspan=" | + | | style="border: 1px solid #000000; background-color: #DFDFDF; text-align: center;" rowspan="6"|[[South City|<span style="font-size: 20px; font-weight:bold;">SO</span><br />South City]]||[[South City#Classic|Classic]]||SO1||2.033 km (1.263 mi)||30 |
|- | |- | ||
| − | |Sprint Track 1||SO2||1. | + | |[[South City#Sprint_Track_1|Sprint Track 1]]||SO2||2.048 km (1.273 mi)||16 |
|- | |- | ||
| − | |Sprint Track 2||SO3||0. | + | |[[South City#Sprint_Track_2|Sprint Track 2]]||SO3||1.334 km (0.829 mi)||16 |
|- | |- | ||
| − | |City Long||SO4||2. | + | |[[South City#City_Long|City Long]]||SO4||4.029 km (2.504 mi)||32 |
|- | |- | ||
| − | |Town Course||SO5|| | + | |[[South City#Town_Course|Town Course]]||SO5||3.146 km (1.955 mi)||32 |
|- | |- | ||
| − | | | + | |[[South City#Chicane_Route|Chicane Route]]||SO6||2.917 km (1.813 mi)||32 |
|- | |- | ||
| − | | | + | | style="border: 1px solid #000000; background-color: #DFDFDF; text-align: center;" rowspan="6"|[[Fern Bay|<span style="font-size: 20px; font-weight:bold;">FE</span><br />Fern Bay]]||[[Fern Bay#Club|Club]]||FE1||1.584 km (0.984 mi)||32 |
|- | |- | ||
| − | | | + | |[[Fern Bay#Green|Green]]||FE2||3.086 km (1.918 mi)||32 |
|- | |- | ||
| − | | | + | |[[Fern Bay#Gold|Gold]]||FE3||3.514 km (2.183 mi)||32 |
|- | |- | ||
| − | | | + | |[[Fern Bay#Black|Black]]||FE4||6.559 km (4.076 mi)||32 |
|- | |- | ||
| − | | | + | |[[Fern Bay#Rallycross|Rallycross]]||FE5||2.018 km (1.254 mi)||32 |
|- | |- | ||
| − | | | + | |[[Fern Bay#Rallycross_Green|Rallycross Green]]||FE6||0.745 km (0.463 mi)||24 |
|- | |- | ||
| − | | | + | | style="border: 1px solid #000000; background-color: #DFDFDF; text-align: center;" rowspan="4"|[[Autocross|<span style="font-size: 20px; font-weight:bold;">AU</span><br />Autocross]]||[[Autocross#Autocross|Autocross]]||AU1||N/A||16 |
|- | |- | ||
| − | | | + | |[[Autocross#Skid_Pad|Skid Pad]]||AU2||N/A||16 |
|- | |- | ||
| − | |Eight Lane Drag||AU4||0. | + | |[[Autocross#Drag_Strip|Drag Strip]]||AU3||0.402 km (0.250 mi)||2 |
| + | |- | ||
| + | |[[Autocross#8_Lane_Drag|Eight Lane Drag]]||AU4||0.402 km (0.250 mi)||8 | ||
|} | |} | ||
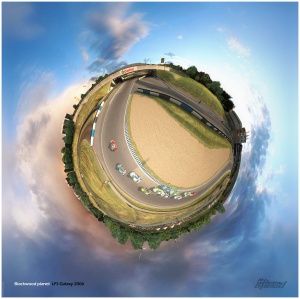
| − | *'''Blackwood''' - Located in the English countryside, the Blackwood circuit, characterized by a long back straight, is the environment available in the demo. It contains | + | *'''Blackwood''' - Located in the English countryside, the Blackwood circuit, characterized by a long back straight, is the environment available in the demo. It contains two road and one rallycross configuration, plus reverse for each, and a rectangular parking lot for autocross. For licensed racers, an industrial estate area is accessible through the open configuration. |
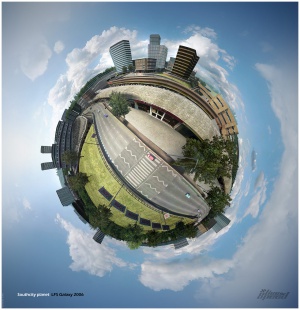
| − | *'''South City''' - Mimicking a city environment, the South City track is distinguished by tight turns and Armcos, and is the most popular S1 track. It contains | + | *'''South City''' - Mimicking a city environment, the South City track is distinguished by tight turns and Armcos, and is the most popular S1 track. It contains six road configurations, plus reverse. |
| − | *'''Fern Bay''' - The Fern Bay circuit is situated on the Jamaican coast and is a tight and twisty track. It has four road and two rallycross configurations, plus reverse, including the longest S1 road configuation at | + | *'''Fern Bay''' - The Fern Bay circuit is situated on the Jamaican coast and is a tight and twisty track. It has four road and two rallycross configurations, plus reverse, including the longest S1 road configuation at 6.6 km (4.1 mi). |
*'''Test Area''' - A group of non-circuit environments that include: | *'''Test Area''' - A group of non-circuit environments that include: | ||
**'''Autocross''' - A large, flat, L-shaped parking lot with placeable marker objects for custom track layouts | **'''Autocross''' - A large, flat, L-shaped parking lot with placeable marker objects for custom track layouts | ||
**'''Skid Pad''' - A circular pad for testing a car's cornering ability | **'''Skid Pad''' - A circular pad for testing a car's cornering ability | ||
| − | **'''Drag Strip''' - A | + | **'''Drag Strip''' - A 400m, eight-lane drag racing strip |
| − | + | == S2 Tracks == | |
| − | {| border=" | + | {| border="0" style="border: 1px solid #000000; background-color: #FAFAFA;" width="500" |
| − | + | ! colspan="5" style="background-color: #FFCC00; color:#000;" |'''S2 tracks''' | |
| + | |- style="background-color: #DFDFDF;" | ||
| + | ! style="border: 1px solid #000000;" | Track | ||
| + | ! style="border: 1px solid #000000;" | Circuit | ||
| + | ! style="border: 1px solid #000000;" | Abbrev | ||
| + | ! style="border: 1px solid #000000;" | Length | ||
| + | ! style="border: 1px solid #000000;" | Grid Size | ||
| + | |- | ||
| + | | style="border: 1px solid #000000; background-color: #DFDFDF; text-align: center;" rowspan="3"|[[Kyoto Ring|<span style="font-size: 20px; font-weight:bold;">KY</span><br />Kyoto Ring]]||[[Kyoto Ring#Oval|Oval]]||KY1||2.980 km (1.852 mi)||32 | ||
| + | |- | ||
| + | |[[Kyoto Ring#National|National]]||KY2||5.138 km (3.193 mi)||32 | ||
| + | |- | ||
| + | |[[Kyoto Ring#GP_Long|GP Long]]||KY3||7.377 km (4.584 mi)||32 | ||
|- | |- | ||
| − | + | | style="border: 1px solid #000000; background-color: #DFDFDF; text-align: center;" rowspan="5" | [[Westhill|<span style="font-size: 20px; font-weight:bold;">WE</span><br />Westhill]]||[[Westhill#National|National]]||WE1||4.396 km (2.732 mi)||40 | |
| − | |||
| − | |||
| − | |||
|- | |- | ||
| − | | | + | |[[Westhill#International|International]]||WE2||5.750 km (3.573 mi)||40 |
|- | |- | ||
| − | | | + | |[[Westhill#Car_Park|Car Park]]||WE3||N/A||40 |
|- | |- | ||
| − | | | + | |[[Westhill#Karting|Karting]]||WE4||0.483 km (0.300 mi)||40 |
|- | |- | ||
| − | |Westhill|| | + | |[[Westhill#Karting_National|Karting National]]||WE5||1.316 km (0.818 mi)||40 |
|- | |- | ||
| − | |rowspan="7"|Aston||Cadet||AS1||1. | + | | style="border: 1px solid #000000; background-color: #DFDFDF; text-align: center;" rowspan="7"|[[Aston|<span style="font-size: 20px; font-weight:bold;">AS</span><br />Aston]]||[[Aston#Cadet|Cadet]]||AS1||1.870 km (1.162 mi)||32 |
|- | |- | ||
| − | |Club||AS2||1. | + | |[[Aston#Club|Club]]||AS2||3.077 km (1.912 mi)||32 |
|- | |- | ||
| − | |National||AS3||3. | + | |[[Aston#National|National]]||AS3||5.602 km (3.481 mi)||32 |
|- | |- | ||
| − | |Historic||AS4||5. | + | |[[Aston#Historic|Historic]]||AS4||8.089 km (5.026 mi)||32 |
|- | |- | ||
| − | |Grand Prix||AS5||5. | + | |[[Aston#Grand_Prix|Grand Prix]]||AS5||8.802 km (5.469 mi)||32 |
|- | |- | ||
| − | |Grand Touring||AS6|| | + | |[[Aston#Grand_Touring|Grand Touring]]||AS6||8.002 km (4.972 mi)||32 |
|- | |- | ||
| − | |North||AS7||3. | + | |[[Aston#North|North]]||AS7||5.168 km (3.211 mi)||32 |
|} | |} | ||
*'''Kyoto Ring''' - In this Japanese environment, the atmosphere is set by the tri-oval, the "ring", which links together all configurations. It has one oval and two road configurations, plus reverse. | *'''Kyoto Ring''' - In this Japanese environment, the atmosphere is set by the tri-oval, the "ring", which links together all configurations. It has one oval and two road configurations, plus reverse. | ||
| − | *'''Westhill''' - The | + | *'''Westhill''' - The board of the Westhill Circuit has invested heavily in creating a state of the art environment for racers of any type. The main tracks provide fast and wide turns, spiced up with interesting chicanes and the widest, most beautiful finish straight in S2 with a blind first corner. Recently two karting tracks have been constructed – one small, one large - providing a challenge for even the fittest of racers. |
| − | *'''Aston''' - The Aston race track has several long and short configurations within a setting patterned after the English countryside, full of forest and small hills, and it is the most popular S2 circuit. The seven road configurations, plus reverse for each, include the longest in S2 at | + | *'''Aston''' - The Aston race track has several long and short configurations within a setting patterned after the English countryside, full of forest and small hills, and it is the most popular S2 circuit. The seven road configurations, plus reverse for each, include the longest in S2 at 8.8 km (5.5 mi). Fast and slow turns, some altitude changes and a fast chicane are the main ingredients to this race track. |
| − | = | + | == S3 Tracks == |
| + | {| border="0" style="border: 1px solid #000000; background-color: #FAFAFA;" width="500" | ||
| + | ! colspan="5" style="background-color: #DA0000; color:#FFF;" |'''S3 tracks''' | ||
| + | |- style="background-color: #DFDFDF;" | ||
| + | ! style="border: 1px solid #000000;" | Track | ||
| + | ! style="border: 1px solid #000000;" | Circuit | ||
| + | ! style="border: 1px solid #000000;" | Abbrev | ||
| + | ! style="border: 1px solid #000000;" | Length | ||
| + | ! style="border: 1px solid #000000;" | Grid Size | ||
| + | |- | ||
| + | | style="border: 1px solid #000000; background-color: #DFDFDF; text-align: center;" rowspan="11"|[[Rockingham|<span style="font-size: 20px; font-weight:bold;">RO</span><br />Rockingham]] | ||
| + | |[[Rockingham#ISSC|ISSC]]||RO1||3.097 km (1.924 mi)||40 | ||
| + | |- | ||
| + | |[[Rockingham#National|National]]||RO2||2.697 km (1.676 mi)||40 | ||
| + | |- | ||
| + | |[[Rockingham#Oval|Oval]]||RO3||2.363 km (1.468 mi)||40 | ||
| + | |- | ||
| + | |[[Rockingham#ISSC_Long|ISSC Long]]||RO4||3.253 km (2.021 mi)||40 | ||
| + | |- | ||
| + | |[[Rockingham#Lake|Lake]]||RO5||1.046 km (0.650 mi)||40 | ||
| + | |- | ||
| + | |[[Rockingham#Handling|Handling]]||RO6||1.559 km (0.969 mi)||40 | ||
| + | |- | ||
| + | |[[Rockingham#International|International]]||RO7||3.874 km (2.407 mi)||40 | ||
| + | |- | ||
| + | |[[Rockingham#Historic|Historic]]||RO8||3.565 km (2.215 mi)||40 | ||
| + | |- | ||
| + | |[[Rockingham#Historic_Short|Historic Short]]||RO9||2.197 km (1.365 mi)||40 | ||
| + | |- | ||
| + | |[[Rockingham#International_Long|International Long]]||RO10||4.056 km (2.521 mi)||40 | ||
| + | |- | ||
| + | |[[Rockingham#Sportscar|Sportscar]]||RO11||2.693 km (1.674 mi)||40 | ||
| + | |- | ||
| + | |} | ||
| − | + | *'''Rockingham''' - Europe's fastest racing circuit located at the heart of England, recreated with laser precision. Rockingham is an oval track with many infield configurations. | |
| − | '' | ||
| − | + | {{Tracks}} | |
| − | |||
| − | |||
| − | |||
| − | |||
| − | |||
| − | |||
| − | |||
| − | |||
| − | |||
| − | |||
| − | |||
| − | |||
| − | |||
| − | |||
| − | |||
| − | |||
| − | |||
| − | |||
| − | |||
| − | |||
| − | |||
| − | |||
| − | |||
| − | |||
| − | + | <!-- categories --> | |
| − | + | [[Category:Tracks]] | |
| − | |||
| − | |||
| − | |||
| − | |||
| − | |||
| − | |||
| − | |||
| − | |||
| − | |||
| − | |||
| − | |||
| − | |||
| − | |||
| − | |||
| − | |||
| − | |||
| − | |||
| − | |||
| − | |||
| − | |||
| − | |||
| − | |||
| − | |||
| − | |||
| − | |||
| − | |||
| − | |||
| − | |||
| − | |||
| − | |||
| − | |||
| − | |||
| − | |||
| − | |||
| − | |||
| − | |||
| − | |||
| − | |||
| − | |||
| − | |||
| − | |||
| − | |||
| − | |||
| − | |||
| − | |||
| − | |||
<!-- links to other languages --> | <!-- links to other languages --> | ||
| + | [[cs:Tratě]] | ||
[[de:Strecken]] | [[de:Strecken]] | ||
| + | [[es:Circuitos]] | ||
| + | [[fi:Radat]] | ||
| + | [[fr:Pistes]] | ||
| + | [[hu:Pályák]] | ||
| + | [[it:Piste]] | ||
| + | [[ja:サーキット]] | ||
| + | [[pl:Trasy]] | ||
| + | [[ru:Tracks]] | ||
Revision as of 23:53, 18 March 2017
S1 Tracks
| S1 tracks | ||||
|---|---|---|---|---|
| Track | Circuit | Abbrev | Length | Grid Size |
| BL Blackwood |
GP Track | BL1 | 3.297 km (2.048 mi) | 40 |
| Historic | BL2 | 3.294 km (2.047 mi) | 40 | |
| Rallycross | BL3 | 1.838 km (1.142 mi) | 40 | |
| Car Park | BL4 | N/A | 40 | |
| SO South City |
Classic | SO1 | 2.033 km (1.263 mi) | 30 |
| Sprint Track 1 | SO2 | 2.048 km (1.273 mi) | 16 | |
| Sprint Track 2 | SO3 | 1.334 km (0.829 mi) | 16 | |
| City Long | SO4 | 4.029 km (2.504 mi) | 32 | |
| Town Course | SO5 | 3.146 km (1.955 mi) | 32 | |
| Chicane Route | SO6 | 2.917 km (1.813 mi) | 32 | |
| FE Fern Bay |
Club | FE1 | 1.584 km (0.984 mi) | 32 |
| Green | FE2 | 3.086 km (1.918 mi) | 32 | |
| Gold | FE3 | 3.514 km (2.183 mi) | 32 | |
| Black | FE4 | 6.559 km (4.076 mi) | 32 | |
| Rallycross | FE5 | 2.018 km (1.254 mi) | 32 | |
| Rallycross Green | FE6 | 0.745 km (0.463 mi) | 24 | |
| AU Autocross |
Autocross | AU1 | N/A | 16 |
| Skid Pad | AU2 | N/A | 16 | |
| Drag Strip | AU3 | 0.402 km (0.250 mi) | 2 | |
| Eight Lane Drag | AU4 | 0.402 km (0.250 mi) | 8 | |
- Blackwood - Located in the English countryside, the Blackwood circuit, characterized by a long back straight, is the environment available in the demo. It contains two road and one rallycross configuration, plus reverse for each, and a rectangular parking lot for autocross. For licensed racers, an industrial estate area is accessible through the open configuration.
- South City - Mimicking a city environment, the South City track is distinguished by tight turns and Armcos, and is the most popular S1 track. It contains six road configurations, plus reverse.
- Fern Bay - The Fern Bay circuit is situated on the Jamaican coast and is a tight and twisty track. It has four road and two rallycross configurations, plus reverse, including the longest S1 road configuation at 6.6 km (4.1 mi).
- Test Area - A group of non-circuit environments that include:
- Autocross - A large, flat, L-shaped parking lot with placeable marker objects for custom track layouts
- Skid Pad - A circular pad for testing a car's cornering ability
- Drag Strip - A 400m, eight-lane drag racing strip
S2 Tracks
| S2 tracks | ||||
|---|---|---|---|---|
| Track | Circuit | Abbrev | Length | Grid Size |
| KY Kyoto Ring |
Oval | KY1 | 2.980 km (1.852 mi) | 32 |
| National | KY2 | 5.138 km (3.193 mi) | 32 | |
| GP Long | KY3 | 7.377 km (4.584 mi) | 32 | |
| WE Westhill |
National | WE1 | 4.396 km (2.732 mi) | 40 |
| International | WE2 | 5.750 km (3.573 mi) | 40 | |
| Car Park | WE3 | N/A | 40 | |
| Karting | WE4 | 0.483 km (0.300 mi) | 40 | |
| Karting National | WE5 | 1.316 km (0.818 mi) | 40 | |
| AS Aston |
Cadet | AS1 | 1.870 km (1.162 mi) | 32 |
| Club | AS2 | 3.077 km (1.912 mi) | 32 | |
| National | AS3 | 5.602 km (3.481 mi) | 32 | |
| Historic | AS4 | 8.089 km (5.026 mi) | 32 | |
| Grand Prix | AS5 | 8.802 km (5.469 mi) | 32 | |
| Grand Touring | AS6 | 8.002 km (4.972 mi) | 32 | |
| North | AS7 | 5.168 km (3.211 mi) | 32 | |
- Kyoto Ring - In this Japanese environment, the atmosphere is set by the tri-oval, the "ring", which links together all configurations. It has one oval and two road configurations, plus reverse.
- Westhill - The board of the Westhill Circuit has invested heavily in creating a state of the art environment for racers of any type. The main tracks provide fast and wide turns, spiced up with interesting chicanes and the widest, most beautiful finish straight in S2 with a blind first corner. Recently two karting tracks have been constructed – one small, one large - providing a challenge for even the fittest of racers.
- Aston - The Aston race track has several long and short configurations within a setting patterned after the English countryside, full of forest and small hills, and it is the most popular S2 circuit. The seven road configurations, plus reverse for each, include the longest in S2 at 8.8 km (5.5 mi). Fast and slow turns, some altitude changes and a fast chicane are the main ingredients to this race track.
S3 Tracks
| S3 tracks | ||||
|---|---|---|---|---|
| Track | Circuit | Abbrev | Length | Grid Size |
| RO Rockingham |
ISSC | RO1 | 3.097 km (1.924 mi) | 40 |
| National | RO2 | 2.697 km (1.676 mi) | 40 | |
| Oval | RO3 | 2.363 km (1.468 mi) | 40 | |
| ISSC Long | RO4 | 3.253 km (2.021 mi) | 40 | |
| Lake | RO5 | 1.046 km (0.650 mi) | 40 | |
| Handling | RO6 | 1.559 km (0.969 mi) | 40 | |
| International | RO7 | 3.874 km (2.407 mi) | 40 | |
| Historic | RO8 | 3.565 km (2.215 mi) | 40 | |
| Historic Short | RO9 | 2.197 km (1.365 mi) | 40 | |
| International Long | RO10 | 4.056 km (2.521 mi) | 40 | |
| Sportscar | RO11 | 2.693 km (1.674 mi) | 40 | |
- Rockingham - Europe's fastest racing circuit located at the heart of England, recreated with laser precision. Rockingham is an oval track with many infield configurations.
| Demo | S1 | S2 | S3 |
|---|---|---|---|


