Game modes

From LFS Manual
Jump to navigationJump to search

Training

Training

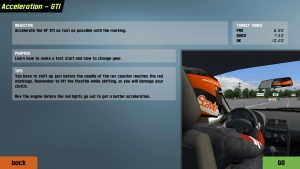
The practice mode in Live for Speed is intended as a driving school which will help everyone new to Live for Speed to acquaint themselves with the driving techniques needed for circuit racing. Of course even for Live for Speed veterans the Training can be of huge benefit in refining their driving style. Choose one of the lessons from the list and on the following screen you will find information about what is asked from you to pass the test. After finishing the exercise, LFS will tell you how well you did.

Most of the lessons have to be finished within a given time and none of the objects may be touched, or the course is failed to pass.

There is also a Training Lesson Editor available.

Multiplayer

Serverlist

Clicking on the Multiplayer button takes you to your virtual online career. While online you always should remember that you are racing against human opponents and should behave appropriately. Drive carefully and try to avoid crashes. Driving cleanly will not only provide better racing - it will even help you to find opponents that want to race you. The quickest way to start is to click on Display List of Hosts and choose one of the many available online hosts. Of course there are additional options which will now be clarified. Upon connecting to a server, one of the most important key to remember is key T, as this allows you to chat with others on the server and ask for further help.

Multiplayer Main Menu

Windowed while connecting: When this option is activated, LFS will switch to windowed mode while connecting. This is useful when you need to manually connect to the internet or when you have a firewall which displays a dialogue when LFS wants to send data to the master server. If your computer automatically connects to the internet and LFS is allowed to communicate with the internet, you can of course disable this option.

Car / helmet skins download: A skin is a special image file giving colour to the exterior of a car or helmet. LFS has an automatic skin downloading system. When you race online, the skins of other racers are automatically downloaded onto your computer so you can see their cars and helmets painted individually. If you would like to make your own skins, we recommend you follow the skin tutorial. After saving a skin in your data\skins folder you can select it in the garage / pits screen. For other racers to see your skins online, visit lfs.net/account/skins and upload your skins. Then your car's selected skin will be automatically downloaded onto the computers of other racers when they see you online.

Display list of hosts

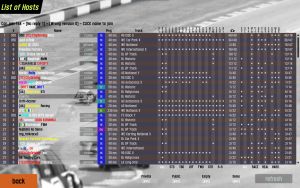
After clicking on this button, LFS will connect to the master server and download a list of all available Live for Speed servers which are not hidden. The list contains extended information about each server including which cars are allowed, which track is being used and how many racers are on the server at the moment.

Symbols:

LFS-Serverlist-Car.png – number of players in race
LFS-Serverlist-Conns.png – number of all connected players

Car filters: The car filters help you find the host you want.

The QUICK method of using the filters: Use the car class buttons on the bottom of the screen to quickly set several car filters. ALL is the default. For fine tuning or manual operation: Click on the vertical car names in the list of games. You can set them to BLACK, BLUE or RED.

BLACK: You don't mind if this car is enabled or not
BLUE: This car MUST be available on the host
RED: This car must NOT be available on the host

- Leave most of them BLACK (the default colour)
- The cars you want to use, set them to BLUE
- Use RED only for cars you really don't want to see

Guests: please join empty hosts - people will join!
Hosts: please don't simply allow all cars, but instead just one car or one of the car classes. That way your server provides the best experience for all racers.

Car codes: In the serverlist you will find some cryptic codes which represent the cars allowed to be driven on the server. The following list contains the available cars of S3:

Further information: Cars
UF1 - UF 1000          (S2, S3)
XFG - XF GTi           (Demo, S1, S2, S3)
XRG - XR GT            (Demo, S1, S2, S3)
XRT - XR GT Turbo      (S1, S2, S3)
RB4 - RB4 GT           (S1, S2, S3)
FXO - FXO Turbo        (S1, S2, S3)
LX4 - LX4              (S1, S2, S3)
LX6 - LX6              (S1, S2, S3)
FZ5 - FZ 50            (S2, S3)
RAC - RaceAbout        (S2, S3)
MRT - MRT5             (S1, S2, S3)
UFR - UF 1000 GTR      (S2, S3)
XFR - XF GTR           (S2, S3)
FOX - Formula XR       (S2, S3)
FBM - Formula BMW FB02 (Demo, S1, S2, S3)
FO8 - Formula V8       (S2, S3)
BF1 - BMW Sauber F1    (S2, S3)
FXR - FXO GTR          (S2, S3)
XRR - XR GTR           (S2, S3)
FZR - FZ 50 GTR        (S2, S3)

Track codes: The tracks are also specified within the server list using codes listed in the following table. Each configuration with the exception of the drag strips, car parks (both Blackwood's and Autocross's car park) and Skid Pad can also be run either in normal or reverse direction, effectively doubling the number of tracks. The track code is usually a combination of three parts: 1. Track identifier, 2. Config number and 3. Reverse / open config flag. Example: BL1R would stand for "Blackwood GP Reverse", AS3 for "Aston National", SO2Y for South City open track with SO Sprint 1 Reverse pitlane and grid etc.

Further information: Tracks
BL - Blackwood     (4 configs: GP, Historic, Rallycross, Car Park)
SO - South City    (6 configs: Classic, Sprint 1, Sprint 2, City Long, Town Course, Chicane Route)
FE - Fern Bay      (6 configs: Club, Green, Gold, Black, Rallycross, Rallycross Green)
AS - Aston         (7 configs: Cadet, Club, National, Historic, Grand Prix, Grand Touring, North) 
WE - Westhill      (5 configs: National, International, Car Park, Karting, Karting National)
KY - Kyoto Ring    (3 configs: Oval, National, GP Long)
AU - Autocross     (4 configs: Autocross, Skid Pad, Drag Strip, 8 Lane Drag)
RO - Rockingham    (11 configs: ISSC, National, Oval, ISSC Long, Lake, Handling, International, Historic, Historic Short, International Long, Sportscar)
LA - Layout Square (2 configs: Long Grid, Wide Grid)

Info codes: Each server on the list has a info column which provides a quick overview of how the server is set up, using six different abbreviations, shown at the top of the list, to indicate the settings.

VOT - Voting (for kick/ban) is allowed
SEL - Selecting the track is allowed
QLY - Qualifying is possible (otherwise only race)
MID - Mid-race join is enabled
PIT - Pit stop is mandatory
REF - Refuelling allowed
VIS - Remote cars fuel visible
RST - Car-reset is allowed
FCV - Forced Cockpit View is activated on the server
CRU - Server is a cruise server
MOD - Allow vehicle mods
UNA - Allow unapproved mods
R - Host is connected to the InSim Relay
R+ - host uses the anti-shortcut option

Additional filters at the bottom of the screen:

ALL  – show all hosts
RACE – only race servers (wrong way is not allowed)
REAL – only race servers with car-reset disabled
HARD – only race servers with car-reset disabled and forced cockpit view

Join specific host

Join Specific Host screen

This option helps you to join a specific server, for example a team or racing series server, without having to browse the serverlist before. Every time you click on Join specific host, the last server you raced on will be preset. This makes it possible to rejoin a server that you have been disconnected from within a few seconds. LFS remembers the last used server even after you restart the program (or your computer).

Host name: Entering the server's name will connect you directly with the server. Capitalisation and colours are ignored.

Host password: Some servers are not opened to the public as they serve specific purposes like team practice or racing series events. These servers are usually protected by a password which you can enter here. Many servers, even public ones, have set up an admin password. If you enter this admin password, you will be allowed to change certain server-settings by using specific chat-commands (see key-commands). Capitalisation is generally ignored but colours have to match.

Start new host

Start New Host screen

You can open your own server for Live for Speed. When you start a server from within LFS itself, the server will can run forever as long as there are people racing on it. The server will shut down after 5 minutes of being empty, or whenever you click the end host button on the main menu. You can create 1 of these in-game servers per LFS account.

When an in-game host has been created you can manage it from within LFS via the options button on the main menu (if you are an administrator), but also from within the LFS website at the Hosting administration page. There you can also find the host's IP address and InSim port in case you would like to connect your own InSim application to it.

Online mode: This restricts the available content on your server. If you want to restrict your host just to the demo content of LFS, choose demo. After unlocking your LFS, you can restrict your server to a level of licensed content.

Location: Choose the server location which is closes to the people who will join your server. Available server locations are Netherlands, USA, Japan, Brazil, Australia, Hong Kong and Turkey.

Visibility: If you select hidden your server will be logged in on the master server but not visible on the player's server list. Only players that know the exact server name will be able to connect to the server.

Host name: This is the name of your server, which will show up in the server list, or if the server is hidden has to be manually entered by the racers that want to connect. For servers started from within LFS, the host name will be stripped from all colours in the list of hosts.

Host password: Entering a password into this line will change the server from a public into a private server. Only racers knowing the password will be able to connect. Leaving this line empty will allow everyone to connect.

Admin password: Entering an administrator password will allow a remote administration of the Live for Speed server. A racer who connected using the admin password will be allowed to change certain server-settings using a set of chat commands.

Max guests: This is the maximum number of PCs that will be allowed to connect to your server. This number does not necessarily match the number of racers that will be able to race on your server.

Max (real + AI) in race: This is the maximum number of cars that will be allowed to race on your server. This includes human racers as well as the AI.

Maximum (real + AI) per guest: This is the maximum number of cars every single guest PC might run on your server. This includes human racers as well as the AI.

Maximum (real + AI) on host pc: This is the maximum number of cars you will be able to race on your server.

Smoothness (packets per sec): Every second all the connected PCs receive data packets from the server which inform them about the positions of all the cars on the track. The more packets per second the PCs receive the more fluent the movement of all the other cars will be and thus the simulation will simply be more immersive. This value determines how many packets per second will be sent. You should always try to keep this value as high as possible.

Allow vote kick / ban: LFS allows the racers to kick or ban another racer by voting to do so. This has proven to be a good way to prevent people to destroy the races of others on purpose. If this option is set to [no] only the server administrator will be allowed to kick or ban other racers.

Allow guests to select tracks: If set to [yes] this allows the connected to choose the track they want to race on, otherwise only the server administrator will be allowed to choose a different track.

Allow mid-race join: Allows players to join the track after the race has been started.

Pit stop required: If set to [yes], all players will have to make one mandatory pit stop at some point during the race.

Refuelling allowed: Allows players to refuel their cars during a pit stop.

Remote cars fuel visible: Allows everyone to see the fuel level of all other players in the F12 menu.

Allow car reset: Allows players to reset their car while on track (the default key to reset is space).

Force cockpit view: If set to [yes], everyone will be forced to use the in-car view, the helicopter view or the TV camera view.

Cruise (wrong way allowed): Disables the 'WRONG WAY' warning text when driving the wrong way in a race.

Allow vehicle mods: Allows usage of vehicle mods on the server.

Allow unapproved mods: Allows usage of unapproved vehicle mods on the server. Unapproved mods are likely to be worse in terms of driving experience and may contain more errors. See the Vehicle Mod Submission Guidelines for more information about the mod approval process.

Find user online

As every player in Live for Speed has a unique player name, you can search for every player from within LFS. Just enter the player's name you are searching for and, if the player is online, you will be asked if you want to join them on the server.

Single player

Singleplayer mode

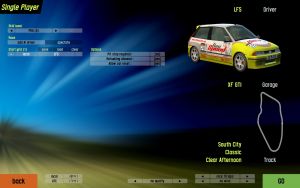
Even though Live for Speed was developed to offer the best online racing possible, its single player mode is not only a necessary addition but also very usefull in different aspects. The single player can be used to learn new tracks, develop setups or even practice some overtaking against the AI. If you make a mistake in single player mode, you will never anger anyone – except yourself, perhaps.

Skill Level: The speed of the AI can be varied from Beginner to Pro.

Add AI driver: You can add up to 20 AI drivers to the race. If you have just demo licence, you can add then up to 12 AI drivers.

Join Race: This allows you to enter the race yourself. If you have already added 20 (or 12 in demo) AI drivers to the race, you will not be allowed to join yourself as 20 (or 12) is the maximum number of racers allowed.

Start grid: This is a list of all participating drivers. Clicking on a drivers name will select this driver, clicking on the - in front of the name will remove the driver from the grid. You can also save your starting grid or load an existing one.

Swap position: This button will only be visible when an AI has been selected from the grid. When you click on this button you will swap position with the selected AI in the grid.

Player: This button directly takes you to the player's options, allowing you to change the name, the driver model you use and your nationality.

Garage: This button takes you to the pits where you can set up and tune your car.

Track: This button lets you choose the track, its configuration, the weather and the time of day.

Wind: This button lets you choose the wind type on the selected track. It has three settings, no wind, low wind and high wind. The wind direction and speed is randomized by LFS and it will have a noticeable impact on your laptimes and braking points! INFORMATION: Currently AI-players can't drive on windy tracks.

Laps: The grey buttons allow you to choose how many laps you want to race. Choosing 0 laps will start an unlimited practice session which probably is the best way to learn new cars and tracks as you can do as many timed laps as you want. As soon as you select 1 or more laps to race, an additional control appears which lets you choose if you want to have a qualifying before the race and how long it should be.
INFORMATION: The number of laps is limited to a max of 1000. You can also choose 1-48 hours for endurance races.
ADVICE: Right-Clicking on the buttons will change the value in larger steps.

Game Lobby Screen

In the game lobby screen you will set up your single and multiplayer races. Here you can choose your car, including it's skin and setup, the track and set up how long you want to race.

Let’s examine the buttons you can access and their usage. You can see a skill level button labeled pro with an arrow at each end, this button controls the level of intelligence for the AI (Artificial Intelligence) clicking on the left arrow lowers the value, the right increases the value, newbie is the lowest value and starting point, pro is the highest level.

The next button under the skill level is the add AI button this adds a robot car to LFS ready to race against you or against another AI car or the clock; up to twelve (Demo only) or 24 (S3/S2/S1) AI can race at any one time or eleven AI against you, the racer in offline mode. AI racing is fun and a great way to learn the tracks, racing lines etc., AI can consist of different cars against each other, due to similar outputs and abilities many LFS racers have pitted the GTi against the GT and close racing & great spectator fun has always ensued.

The join race button is self explanatory; this allows you to add your car, manned by you and join in the fun. Looking now to the group of buttons to the right of the screen, we see that the next button is called the player button.

Garage Area and Car Settings

Your car in the Garage
Vehicle mod selection

Next we have the main screen you probably will deal with in LFS, this is the garage area, it is here you select your car type, create, add and delete setups and modify all kinds of stuff. Most of these buttons are very easy to figure out and largely self-explanatory, starting from top left we see the car colours panel.

The car colours panel allows you to add, delete and modify the colour schemes of your own prepared skins and some LFS supplied skins. Clicking on the individual colour icon, or using the new button to add a new named skin to the list, from a pop up selection of named skins in the data\skins folder.

Under the colour panel is the driver and force panel, this allows you to turn on force lines to show the level of force on the car and add a driver and rotate and bounce the car. Have a play around with it and see the difference stiffer suspension, driver weight, has etc.

The vertical row of buttons (right) contain your car setups for the selected car. Setups sent to you in multiplayer mode will appear here, as well as setups you may have downloaded from LFSForum or some other site. The new button will allow you to make a copy of the currently selected setup, (you then make changes to the new one preserving the original) delete removes the selected setup from the list and LFS.

The most important part on this screen is the horizontal row of car setup buttons, as the naming suggests you can alter the settings of many components here. Info view has details about each car such as weight, power output, drive train etc. In this view you can also adjust the amount of fuel and ballast and set the percentage of intake restriction.

This whole area has its own separate guide to allow you get the most out of the ability to customise your car for optimum performance and fun. However, briefly, you will notice that all sub menus have sliders to increase or decrease the selected values. Using the sliders you may also right-click on any slider to directly type in the value or you can copy and paste values with Ctrl + RMB and ⇧ Shift + RMB respectively.

Make a copy of the default hard track setup by highlighting it, click New setup to create a copy and save under a different name and play around with the settings by increasing or decreasing items, use small adjustments at first etc, when finished click OK to return to the Lobby screen and add to race by clicking the join race button.

Track Selection

Choose your track

Next we will cover the last button; the track selection button, pretty important as we need a safe place to race our cars, hey? You will see a small map showing the selected track from an overhead view and details on the overall length of that track.

There are seven major track areas for racing, the sevenths area Autocross is a skid pad zone for building tracks and experimenting, as well as a two and eight lane drag strip area. To use a track, simply select the desired track from the main areas on your right, this will bring a submenu containing all the tracks available for that particular raceway. You can then choose which of the separate tracks to race on by clicking on that track name. After choosing the track layout, any available Autocross layouts for your chosen track will appear to the right below the available configurations. A map showing the track path is then displayed, and options to change the weather conditions (lighting only) are available from the weather menu, with its three options:

BRIGHT CLEAR - OVERCAST - CLOUDY SUNSET/DUSK - You have to make the choice! At this stage of LFS development actual weather conditions, such as rain, hail, fog etc have not been implemented, nor has night racing.

The X and Y buttons switch to a open track configuration. That means you can go anywhere you like at the track. You can also create custom track configs by adding checkpoints and blocking the unnecessary roads with barriers. Pit lane and starting grid depends on which X or Y you select - so e.g. South City Chicane Route X will have the same pit lane and grid as the normal track.

Clicking the OK button or clicking the track image will lock in the selected track and options you have chosen and return you to the Single Player selection screen where you can join the race and start racing by clicking the GO button.

Hotlapping

Hotlapping

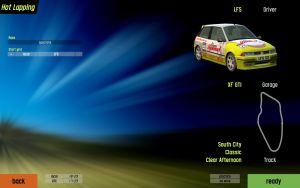
In hotlapping mode you can try to compete with the best drivers in the world without even going online.

This mode puts you on the track in a controlled and perfect environment and lets you fight against the clock. But you should be careful not to leave the road or hit an object while trying to improve your lap times as the HLVC (Hot Lapping Validity Check) will constantly watch what you are doing and mark any lap as invalid which was not clean. In the top right corner of the screen you will see the fastest valid lap you have done and the last split times you did. After you have done a lap that was a personal best and that was marked as valid by the HLVC, you can upload it to http://www.lfsworld.net, compare your time to the official world-record time and see how you rank against all the other racers out there.

You can also adjust tyre warmer temperature on all tyres in Garage - Tyres (two sliders per each axis). This is useful when you are either struggling to heat up the tyres or your tyres are too hot to make a good time. This feature is currently available only in hotlap mode though.

Saved replays you can find in data\spr folder. Best way to save replay is to press 1 key, this saves replay file with automatic name in format youraccountname_track_car_time.spr, eg. somebody_AS1_UF1_10883.spr. To name replay file yourself, press 2 key. To upload a replay, open "Hotlaps" in "LFSWorld" (lfsworld.net), and go to tab Hotlap Charts.

You can access the hotlap database from online game, see LFS World info.

TIP: Replays of all the laps that have been uploaded to LFS World can be downloaded and then watched on your PC. This is the perfect way to study the racing line of the world's best drivers and improve your own laptimes.

Replays

Replays

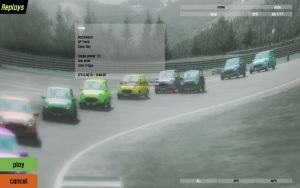
One of the great features of LFS is the ability to record a replay of each race, whether it be a Single Player Race (SPR) or a Multiplayer Race (MPR, LAN or Online). Watching a replay you can use various camera-perspectives, speed-up, slow-down or even pause the playback. The appropriate hotkeys are listed in the key commands chapter. To record a race it is customary to set this feature in the Options/Game section as we discussed before, however, you can save a recorded session by hitting the 2 key on the main keyboard, this saves the race up until that point, this is useful when you have just finished an online race and want to save it before everyone restarts.

During a single player replay, if you hit the Esc key, you will be presented with some options:

Options: Takes you to main options screen

Replay: Restarts the selected replay

Output lap data: Saves technical information to a .RAF (Replay Analyser File) that you import into external programs, such as LFS Replay Analyser or F1PerfView available from the Live For Speed main site.

Test drive: This allows you to drive the track using the car setup from, for example, a world record hotlap replay. You may have to change your controller settings to suit if they use a wheel and you use a keyboard or mouse.