Difference between revisions of "LFS Editor/Guides/Driver Side Swap"
From LFS Manual
< LFS Editor | Guides
Jump to navigationJump to search (Created page with "=== Driver Side Swap === {{steps | Open the model you will edit | Click the {{old button|Edit|#a1a1ff}} button in the bottom right | Click the {{old button|tri}} button at th...") |
|||
| Line 2: | Line 2: | ||
{{steps | {{steps | ||
| − | | Open the model you will edit | + | | Open the model you will edit. [[LFS Editor/Vehicle Editor/Load|Load model]] |
| Click the {{old button|Edit|#a1a1ff}} button in the bottom right | | Click the {{old button|Edit|#a1a1ff}} button in the bottom right | ||
| Click the {{old button|tri}} button at the top to enter, or pressing the {{key press|2}} key. [[LFS Editor/Triangle Mode|Triangle Mode]]. | | Click the {{old button|tri}} button at the top to enter, or pressing the {{key press|2}} key. [[LFS Editor/Triangle Mode|Triangle Mode]]. | ||
Revision as of 18:06, 22 September 2024
Driver Side Swap
- 1 Open the model you will edit. Load model
- 2 Click the Edit button in the bottom right
- 3 Click the tri button at the top to enter, or pressing the 2 key. Triangle Mode.
- 4
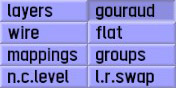 from the view models section at the bottom right Click the l.r.swap
- 5 Select the triangles you want to switch sides and click the swap button. After clicking on l.r.swap, this section will be on the top right

- 6 The triangles you selected will look like this ➔ .
- 7 After you finish the triangles Click the pressing the esc key. LFS Editor/Vehicle Editor/Class & Inputs.
- 8 From the bottom left click locked drive side and confirm.
- 9
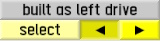 and when you press the direction buttons, you will notice that the driver's side and the triangles you selected change.


