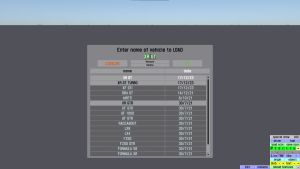
LFS Editor/Vehicle Editor/Load
From LFS Manual
< LFS Editor | Vehicle Editor
Jump to navigationJump to search| LFS Editor | |
|---|---|
|
|
| Vehicle Mods |
If you want to import an external 3D model into the editor, see Importing an external 3D model.
Vehicles are loaded into the LFS Editor using the LOAD button. Vehicle files are located in data\veh folder and have a .veh extension.
The default LFS editor installation contains vehicle files of all default LFS cars except BF1. You are free to modify the default cars as long as you submit them under the LFS license.
Loading a vehicle
| Loading a new vehicle will discard any unsaved changes made in an already loaded vehicle! Make sure to save the changes if needed. |
- 1 At the bottom left, click LOAD. A dialog "Enter name of vehicle to LOAD" will appear.
- 2 Select a vehicle from the list of files.
- 3 Click OK.
Renaming a vehicle
- 1 At the bottom left, click LOAD. A dialog "Enter name of vehicle to LOAD" will appear.
- 2 Select a vehicle you want to rename from the list of files.
- 3 Click Rename. The dialog title will change to "Enter new name for file".
- 4 Edit the vehicle name and click OK or press ↵ Enter.
You can rename a vehicle file by selecting it in the Load vehicle dialog and pressing Rename.
Deleting a vehicle
- 1 At the bottom left, click LOAD. A dialog "Enter name of vehicle to LOAD" will appear.
- 2 Select a vehicle you want to delete from the list of files.
- 3 Click Delete. A confirmation dialog will appear.
- 4 Click Yes to confirm the deletion.
