Difference between revisions of "Options"
gigi91430ita (talk | contribs) |
gigi91430ita (talk | contribs) |
||
| Line 113: | Line 113: | ||
== Visuali == | == Visuali == | ||
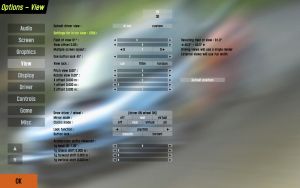
[[image:View.jpg|thumb|View (in-car mode)]] | [[image:View.jpg|thumb|View (in-car mode)]] | ||
| − | + | Le impostazioni nell categoria Visuali regoleranno la vista della camera durante il gioco. Creare delle impostazioni che rispecchino le proprie necessità personali è consigliabile, in quanto si tratta di quello che potrete vedere una volta che sarete in macchina. Verranno analizzate le voci dall'alto verso il basso. Notare che tutte le opzioni tranne "Accelerazione muove punto di vista" sono regolabili macchina per macchina, permettendo il massimo della personalizzazione. | |
| − | ''' | + | '''Visuale predefinita:''' [in macchina / personalizzato] <br> |
| − | + | Potete avere due telecamere statiche durante il gioco, quella standard, che è la più realistica, e quella personalizzata che può essere piazzata ovunque. L'impostazione della telecamera personalizzata verrà spiegata in un secondo momento. La selezione di una delle due opzioni determinerà quale sarà la visuale che verrà attivata non appena iniziate una gara dopo aver aperto LFS. La visuale predefinita può essere richiamata premendo SHIFT+F1. Selezionate la visuale che userete più spesso. | |
| − | ''' | + | '''Campo di visuale:''' <br> |
| − | + | L'ampiezza della visuale che vi sarà mostrata nel gioco, conosciuta anche come quantità di zoom. Un campo di visuale più piccolo porterà ad uno sguardo incentrato in ciò che avete di fronte, ma mostrerà di meno ciò che avete accanto a voi, che è altrettanto importante. Un campo più grande porterà ad una visione più vasta, ma distante da quello che c'è davanti a voi. Sta a voi trovare un compromesso, provate e regolate lo slider fino a quando non vi troverete nella posizione migliore. Il valore predefinito è attorno ai 90°. | |
| − | ''' | + | '''Rotazione con pulsante'''<br> |
| − | + | Permette di regolare in gradi di quanto dev'essere ruotata la testa a destra o a sinistra quando si premono i pulsanti "Guarda a DX" e "Guarda a SX". Aumentando la rotazione potrete vedere meglio ciò che avete di fianco a voi, ma distoglierete di più lo sguardo dalla strada. | |
| − | ''' | + | '''Inclinazione visuale:''' <br> |
| − | + | La direzione verticale della telecamera può essere impostata qui, può puntare verso l'alto con un valore positivo o verso il basso con un valore negativo. | |
| − | ''' | + | '''Ruota visuale:''' <br> |
| − | + | La direzione orizzontale della telecamera. Può puntare verso sinistra con un valore negativo o verso destra con un valore positivo. | |
| − | ''' | + | '''X / Y / Z Offset'''<br> |
| − | + | Permette di spostare orizzontalmente (X), verticalmente (Y) o in profondità (Z) la telecamera. | |
| − | ''' | + | '''Muovi visuale sterzando:''' [Yes / No] <br> |
| − | + | Questa opzione permette di scegliere se la telecamera si deve muovere assieme alla testa del pilota quando sterza a destra o a sinistra. Sebbene l'attivazione sia più realistica, la sua utilità è soggettiva. | |
| − | ''' | + | '''Posizione del retrovisore:''' <br> |
| − | + | Con queste impostazioni regolerete la posizione del retrovisore interno. con "posizione retrovisore (SX-DX)" regolate la posizione orizzontale dello specchietto, mentre con "altezza retrovisore" regolate la sua posizione verticale. Regolatelo in modo che possiate sempre vederlo, dato che si tratta di uno strumento importante. | |
| − | ''' | + | '''Mostra pilota / volante:''' <br> |
| − | + | Modifica ciò che vedete con la visuale interna. Il pilota con il volante, solo il volante o nessuno dei due. Alcune persone che usano un volante con LFS preferiscono non mostrare il volante in LFS in quanto può dare fastidio vedere un altro volante muoversi allo stesso modo di quello che si sta controllando. | |
| − | ''' | + | '''Modalità retrovisore:''' [off / reale / virtuale / tutto] <br> |
| − | + | Imposta come devono essere visualizzati gli specchietti. "off" li disattiva, "reale" mostra l'immagine nei retrovisori della macchina, "virtuale" mostra l'immagine in un display fittizio in mezzo alla parte alta dello schermo e "tutto" combina le modalità "reale" e "virtuale". | |
| − | ''' | + | '''Modalità quadranti:''' [off / reale / virtuale / tutto] <br> |
| − | + | Definisce come devono essere visualizzati gli indicatori del cruscotto della macchina. "off" non visualizza nulla, "reale" mostra le indicazioni nel cruscotto della vettura, "virtuale" mostra le indicazioni sullo schermo e "tutto" combina le modalità "reale" e "virtuale". | |
| − | ''' | + | '''Impostazioni "Accelerazione muove punto di vista":''' <br> |
| − | + | Queste opzioni definiscono di quando si devono muovere e scuotere le visuali standard e personalizzata quando vengono sottoposte alle accelerazioni G. Con tutte le opzioni settate su 0, la telecamera resterà immobile nella sua posizione. Visto che la testa e il corpo umano si muovono sotto le sollecitazioni delle varie forze, la visuale interna dovrebbe muoversi allo stesso modo. Per un'impostazione realistica, settate queste opzioni tra 0 ed il 50% del loro massimo valore. | |
| − | === | + | '''Funzione:''' [asse / sterzo / ms X / ms XY] <br> |
| + | Con questa opzione, potete impostare modi aggiuntivi per guardare a destra e a sinistra oltre ad utilizzare gli appositi tasti "guarda a DX" e "guarda a SX". L'opzione "asse" muoverà la telecamera a destra e a sinistra con un determinato asse specificato nel menu Controlli. Leggete la guida sui controlli per comprenderne il funzionamento. L'opzione "sterzo" muoverà la telecamera assieme allo sterzo. Sterzare a sinistra porterà la telecamera a muoversi verso sinistra. Può essere abbastanza utile visto che quando sterzate a sinistra, vorrete andare verso quella direzione e una visuale guardando da quella parte mostrerà una porzione maggiore di quello a cui andremo in contro. La quantità di rotazione della telecamera rispetto allo sterzo può essere impostata con lo slider "Sensibilità". Per trovare un buon valore di sensibilità, sterzate completamente da una parte e regolate la sensibilità in modo da trovare la massima quantità di rotazione desiderata. Ms X muoverà la telecamera a destra e a sinistra secondo i movimenti del mouse. Per la sensibilità vale la stessa regola di prima. L'opzione "Zona morta" vi aiuterà a trovare la posizione della telecamera quando dovrebbe guardare esattamente davanti. Un'impostazione molto alta della zona morta comporterà un grande movimento del mouse prima di poter ruotare la telecamera, mentre un'impostazione bassa farà muovere la telecamera al minimo movimento del mouse, senza segnare una differenza quando si passa dal centro. Ms XY farà le stesse cose, solo che la telecamera si muoverà anche verso l'alto e verso il basso. | ||
| + | |||
| + | '''Visuale:''' [graduale / Istantaneo] <br> | ||
| + | Questa impostazione definirà il comportamento della telecamera quando vengono premuti i tasti "guarda a SX" e "guarda a DX". Quando viene premuto un tasto, l'impostazione graduale porterà gentilmente la telecamera a guardare verso la direzione impostata, mentre l'impostazione istantanea punterà la telecamera direttamente verso la direzione segnalata, senza dare una sensazione di movimento. | ||
| + | |||
| + | === Impostazione della telecamera personalizzata === | ||
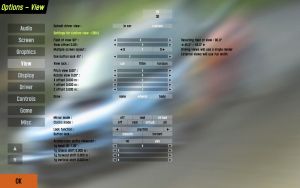
[[image:ViewCustom.jpg|thumb|View (custom mode)]] | [[image:ViewCustom.jpg|thumb|View (custom mode)]] | ||
| − | ( | + | (Nota: Ogni telecamera personalizzata impostata è salvata in base alla vettura. In questo modo potrete avere diverse impostazioni per ogni macchina.) |
| − | + | Andate nel menu Visuali e cliccate cliccate su "personalizzato" alla voce "visuale predefinita". Noterete che le opzioni disponibili ora chiamate "impostazioni per personalizzato" sono cambiate leggermente. | |
'''Draw (main):''' [None / Wheels / Body] <br> | '''Draw (main):''' [None / Wheels / Body] <br> | ||
Revision as of 13:44, 18 October 2008
Audio
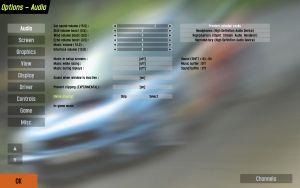
Questo menu vi permette di cambiare il volume della musica e di altri suoni.
Volume macchina:
Controlla il volume di tutti i suoni prodotti dalle automobili, rispetto a quelli della muscia o dell'interfaccia. Se il suono del motore è distorto, riducete questo valore. Il valore predefinito nella Versione S2 Z è 15.0.
Volume sgommate:
Aumenta il vero suono delle sgommate rendendole più facili da udire. Settate 0.0 per avere un suono relalistico o 1.0 per avere un suono potenziato. Il valore predefinito nella versione S2 Z è 0.5.
Volume vento:
Come sopra, ma per i suoni del vento. Notare che indipendentemente da questa impostazione, il rumore del vento sarà molto più forte nelle vetture scoperte che in quelle chiuse. Un valore realistico è 0.0. Il valore predefinito nella versione S2 Z è 0.5.
Volume eco:
Determina il volume dell'effetto eco. Un valore 0.0 potrebbe essere realistico, ma potete ovviamente regolarlo a vostro piacimento. Comunque valori alti possono aumentare problemi di distorsione. Il valore predefinito nella versione S2 Z è 0.5
Volume musica:
Volume della musica nei menu e durante il gioco. Il valore predefinito nella versione S2 Z è 5.0
Volume interfaccia:
Volume dei suoni dell'interfaccia, come i click dei pulsanti. Il valore predefinito nella versione S2 Z è 10.0.
Musica nei menu:
Permette di scegliere se attivare o meno la musica nei menu.
Musica in gara:
Permette di scegliere se attivare o meno la musica in gara.
Musica nei replay:
Permette di scegliere se attivare o meno la musica durante la riproduzione dei replay.
Scelta della canzone:
Usando i tasti "Salta" e "Seleziona" potete scegliere la canzone da riprodurre.
Musica in-game:
LFS supporta le playlist, e qui potete vedere e scegliere quale playlist usare in un determinato momento. Usando "Salta" potete passare alla canzone successiva e usando "Seleziona" potete scegliere direttamente una canzone.
Canali:
Usando questo tasto entrerete nell'interfaccia per la creazione e la modifica delle playlist. Channel 1 è il canale predefinito per tutti i menu e non può essere cancellato. Potete aggiungere, rinominare e cancellare le playlist nella parte sinistra dello schermo. Sulla destra potete aggiungere canzoni ed assegnarle alle playlist. Per essere sicuri che una traccia verrà riprodotta, dovete settare la priorità su 3, il valore più alto o 1, la priorità più bassa, mentre dovete impostare "-" se volete che una traccia non venga riprodotta. Più alta è la priorità di una canzone e più è probabile che verrà riprodotta. Questo significa che se avete due canzoni con la stessa priorità, ascolterete entrambe con la stessa frequenza, ma se una canzone ha priorità 3 e un'altra ha priorità 1, ascolterete la prima canzone molto più spesso rispetto alla seconda.
Suggerimento: I file contenenti le tracce musicali di LFS sono codificate nel formato OGG Vorbis. Potete creare i vostri file musicali con l'encoder freeware disponibile nel sito www.vorbis.com o usando Audacity. Per inserire le canzoni in LFS dovete inserirle nella directory ..\Data\Ogg.
Schermo
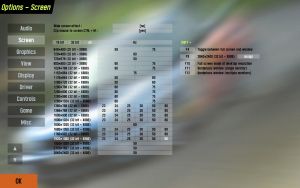
In questo menu potete scegliere la risoluzione che preferite, la profondità di colore e la frequenza di aggiornamento ed assegnare tasti particolari per le diverse configurazioni dello schermo.
Schermo 16:9:
Simula l'effetto letterbox come quando si guarda un film in 16:9 con un televisore 4:3, mostrando due strisce nere sopra e sotto lo schermo.
Mouse limitato a CTRL+C:
Se usate LFS in modalità finestra, potete abbandonare la finestra di LFS con il puntatore del mouse. Questo potrebbe essere un problema se usate il mouse per controllare la macchina. Questa opzione impedisce al puntatore di abbandonare la finestra di LFS. Questa funzionalità può essere attivata e disattivata premendo anche Ctrl+C.
Profondità di colore: [16 bit / 32 bit / tutto]
Attraverso i tre pulsanti "16 bit", "32bit" e "tutto" potete scegliere di filtrare le impostazioni in base alla profondità di colore. L'opzione predefinita in LFS S2 Z è "16 bit".
Tasti (SHIFT+):
Permette di assegnare una risoluzione, profondità di colore e frequenza di aggiornamento ad uno dei quattro tasti tra Shift+F9 e Shift+F12. E' sufficiente scegliere le impostazioni desiderate e cliccare uno dei quattro bottoni sulla destra.
Grafica
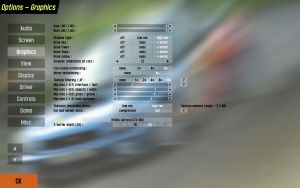
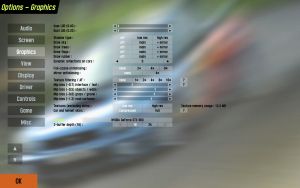
Le opzioni in questo menu permettono di modificare tutte le impostazioni segrete per la qualità grafica. L'ottimizzazione di queste opzioni può aumentare la fluidità di gioco o migliorare la qualità di immagine. Disattivando alcune opzioni potete migliorare sensibilmente l'esperienza di gioco in alcuni computer non proprio aggiornatissimi.
Dettagli:
Questa opzione influenza il livello di dettaglio generale, comprendendo la qualità degli oggetti, delle texture e la profondità di campo. Le ruote, per esempio, sembreranno spigolose in un computer con un basso livello di dettaglio.
Prestazioni: 0.25 | Qualità: 1.00
Dettagli specchi:
Influenza la qualità dell'immagine mostrata negli specchietti, esattamente allo stesso modo in cui l'impostazione sopra regolava il dettaglio generale.
Prestazioni: 0.20 | Qualità: 0.30
Dettagli polvere:
Influenza la qualità della polvere e del fumo.
Prestazioni: 0.25 | Qualità: 1.00
Effetto nebbia: [no / si]
Attiva o disattiva l'effetto nebbia. Se attivo, gli oggetti distanti sono rappresentati coperti da un sottile strato di foschia, accentuando la sensazione di profondità. Tranne che nei computer più vecchi, i suoi effetti sulle prestazioni sono davvero minimi.
Mostra cielo: [off / 16 bit / 32 bit]
Imposta se visualizzare o meno il cielo. Disattivando l'opzione può aumentare le prestazioni su sistemi molto vecchi.
Tipo ombre: [off / bassa ris / alta ris]
Imposta il tipo di ombre usate per le automobili. "Off" disattiva completamente le ombre, "bassa ris" mostra le ombre, ma ad una bassa risoluzione per non appesantire troppo le prestazioni, "alta ris" mostra le ombre al massimo del dettaglio. Al giorno d'oggi sistemi di fascia media o anche bassa non dovrebbero avere problemi ad impostare le ombre al massimo della risoluzione.
Mostra alberi: [off / normale / + specchio]
Imposta se gli alberi devono essere disegnati. Se impostato su "off" non verranno visualizzati aberi, se impostato su "normale" verranno visualizzati ovunque tranne che negli specchietti, se impostato su "+ specchio" verranno visualizzati ovunque.
Mostra bandiere: [off / normale / + specchio]
Imposta se le bandiere attorno al tracciato devono essere visualizzate. Possono essere utili per determinare, ad esempio, la direzione e la forza del vento. Ha un effetto abbastanza leggero sulle prestazioni, comunque funziona come in "mostra alberi".
Mostra sgommate: [off / normale / + specchio]
Imposta se i segni delle gomme sull'asfalto devono essere visualizzati. Normalmente hanno un lieve effetto sulle prestazioni durante una gara, con la sola eccezione se ci sono molti segni in una piccola area, come durante i burnout. Si applica lo stesso funzionamento di "mostra alberi".
Antialising:
Permette di impostare l'antialias. Le impostazioni dipendono dalla scheda video e hanno un notevole impatto sulle prestazioni, anche se la loro attivazione migliora notevolmente la qualità grafica smussando tutte le linee oblique per non farle sembrare seghettate.
Texture filtering/AF
Le texture sono renderizzate a diversi livelli di dettaglio a seconda della dimensione che dovranno assumere nello schermo. Tali livelli di dettaglio sono detti mipmap. Se una texture è renderizzata piccola (ad esempio quando un oggetto si trova lontano) viene usato un mipmap più piccolo. L'opzione di texture filtering modifica il modo in cui sono unite le varie mipmap. "none" equivale al bilinear filtering, ovvero nessuna unione di mipmap e viene utilizzata quella che più si avvicina al risultato finale. "1x" equivale al trilinear filtering, l'immagine è composta dall'unione delle due mipmap più vicine. Le scelte tra "2x" e "16x" equivalgono all'Anisotropic Filtering, un sistema più complesso che riduce l'offuscamento delle superifici oblique (come la strada).
L'Anisotropic Filtering (AF) dà i migliori risultati, ma la sua elaborazione provoca un calo delle prestazioni. L'AF da i migliori risultati con un minor mip bias negativo (slider del mip bias spostato sulla destra).
Mip bias:
Queste opzioni modificano il punto di transizione tra i diversi mipmap di una texture (i mipmap sono descritti alla voce sopra, riguardante il texture filtering). Muovere lo slider sulla sinistra per un aspetto più netto e per ridurre la sfocatura, o sulla destra per avere un aspetto più morbido e per ridurre il brillio. Quando una superficie è obliqua (come il manto stradale in distanza) il texture filtering tende a provocare troppo offuscamento, così sono proposti diversi tipi di superficie a seconda di come è probabile che verranno viste. "interfaccia/testo" valore predefinito -1.0 (non visibile da angolazioni oblique); "oggetti/muri" valore predefinito -2.0; "erba/ghiaia" valore predefinito -3.0; "superficie stradale" valore predefinito -4.0 (spesso vista da angolazioni molto oblique).
Texture (skin escluse): [bassa ris / alta ris]
Imposta se le texture devono essere ad alta risoluzione, per una maggiore qualità grafica a scapito delle prestazioni, o a bassa risoluzione, per migliorare la fluidità con le schede grafiche meno recenti.
Skin macchina e casco: [compresse / non compresse]
Imposta se le skin della macchina e del casco devono essere compresse o lasciate alla massima qualità. Influenza la qualità grafica solo con alcune skin di terze parti, non influenza nulla con le skin originali.
Profondità Z-Buffer: [15 / 16 / 24 / 32]
In linea di massima imposta la quantità di memoria in bit da dedicare alla profondità di campo degli oggetti. Più è alto il valore e più informazioni sulla profondità possono essere conservate. Quando ci si trova con due oggetti vicini tra loro, ma lontani dal punto di vista di chi guarda, un valore basso di Z-Buffer porta la scheda grafica a non capire quale dei due oggetti è davanti all'altro, sovrapponendoli come se fossero alla stessa distanza e creando degli artefatti grafici. Non tutti i livelli di profondità sono disponibili per tutte le schede, ma l'idea migliore è impostare il valore più alto possibile.
Visuali
Le impostazioni nell categoria Visuali regoleranno la vista della camera durante il gioco. Creare delle impostazioni che rispecchino le proprie necessità personali è consigliabile, in quanto si tratta di quello che potrete vedere una volta che sarete in macchina. Verranno analizzate le voci dall'alto verso il basso. Notare che tutte le opzioni tranne "Accelerazione muove punto di vista" sono regolabili macchina per macchina, permettendo il massimo della personalizzazione.
Visuale predefinita: [in macchina / personalizzato]
Potete avere due telecamere statiche durante il gioco, quella standard, che è la più realistica, e quella personalizzata che può essere piazzata ovunque. L'impostazione della telecamera personalizzata verrà spiegata in un secondo momento. La selezione di una delle due opzioni determinerà quale sarà la visuale che verrà attivata non appena iniziate una gara dopo aver aperto LFS. La visuale predefinita può essere richiamata premendo SHIFT+F1. Selezionate la visuale che userete più spesso.
Campo di visuale:
L'ampiezza della visuale che vi sarà mostrata nel gioco, conosciuta anche come quantità di zoom. Un campo di visuale più piccolo porterà ad uno sguardo incentrato in ciò che avete di fronte, ma mostrerà di meno ciò che avete accanto a voi, che è altrettanto importante. Un campo più grande porterà ad una visione più vasta, ma distante da quello che c'è davanti a voi. Sta a voi trovare un compromesso, provate e regolate lo slider fino a quando non vi troverete nella posizione migliore. Il valore predefinito è attorno ai 90°.
Rotazione con pulsante
Permette di regolare in gradi di quanto dev'essere ruotata la testa a destra o a sinistra quando si premono i pulsanti "Guarda a DX" e "Guarda a SX". Aumentando la rotazione potrete vedere meglio ciò che avete di fianco a voi, ma distoglierete di più lo sguardo dalla strada.
Inclinazione visuale:
La direzione verticale della telecamera può essere impostata qui, può puntare verso l'alto con un valore positivo o verso il basso con un valore negativo.
Ruota visuale:
La direzione orizzontale della telecamera. Può puntare verso sinistra con un valore negativo o verso destra con un valore positivo.
X / Y / Z Offset
Permette di spostare orizzontalmente (X), verticalmente (Y) o in profondità (Z) la telecamera.
Muovi visuale sterzando: [Yes / No]
Questa opzione permette di scegliere se la telecamera si deve muovere assieme alla testa del pilota quando sterza a destra o a sinistra. Sebbene l'attivazione sia più realistica, la sua utilità è soggettiva.
Posizione del retrovisore:
Con queste impostazioni regolerete la posizione del retrovisore interno. con "posizione retrovisore (SX-DX)" regolate la posizione orizzontale dello specchietto, mentre con "altezza retrovisore" regolate la sua posizione verticale. Regolatelo in modo che possiate sempre vederlo, dato che si tratta di uno strumento importante.
Mostra pilota / volante:
Modifica ciò che vedete con la visuale interna. Il pilota con il volante, solo il volante o nessuno dei due. Alcune persone che usano un volante con LFS preferiscono non mostrare il volante in LFS in quanto può dare fastidio vedere un altro volante muoversi allo stesso modo di quello che si sta controllando.
Modalità retrovisore: [off / reale / virtuale / tutto]
Imposta come devono essere visualizzati gli specchietti. "off" li disattiva, "reale" mostra l'immagine nei retrovisori della macchina, "virtuale" mostra l'immagine in un display fittizio in mezzo alla parte alta dello schermo e "tutto" combina le modalità "reale" e "virtuale".
Modalità quadranti: [off / reale / virtuale / tutto]
Definisce come devono essere visualizzati gli indicatori del cruscotto della macchina. "off" non visualizza nulla, "reale" mostra le indicazioni nel cruscotto della vettura, "virtuale" mostra le indicazioni sullo schermo e "tutto" combina le modalità "reale" e "virtuale".
Impostazioni "Accelerazione muove punto di vista":
Queste opzioni definiscono di quando si devono muovere e scuotere le visuali standard e personalizzata quando vengono sottoposte alle accelerazioni G. Con tutte le opzioni settate su 0, la telecamera resterà immobile nella sua posizione. Visto che la testa e il corpo umano si muovono sotto le sollecitazioni delle varie forze, la visuale interna dovrebbe muoversi allo stesso modo. Per un'impostazione realistica, settate queste opzioni tra 0 ed il 50% del loro massimo valore.
Funzione: [asse / sterzo / ms X / ms XY]
Con questa opzione, potete impostare modi aggiuntivi per guardare a destra e a sinistra oltre ad utilizzare gli appositi tasti "guarda a DX" e "guarda a SX". L'opzione "asse" muoverà la telecamera a destra e a sinistra con un determinato asse specificato nel menu Controlli. Leggete la guida sui controlli per comprenderne il funzionamento. L'opzione "sterzo" muoverà la telecamera assieme allo sterzo. Sterzare a sinistra porterà la telecamera a muoversi verso sinistra. Può essere abbastanza utile visto che quando sterzate a sinistra, vorrete andare verso quella direzione e una visuale guardando da quella parte mostrerà una porzione maggiore di quello a cui andremo in contro. La quantità di rotazione della telecamera rispetto allo sterzo può essere impostata con lo slider "Sensibilità". Per trovare un buon valore di sensibilità, sterzate completamente da una parte e regolate la sensibilità in modo da trovare la massima quantità di rotazione desiderata. Ms X muoverà la telecamera a destra e a sinistra secondo i movimenti del mouse. Per la sensibilità vale la stessa regola di prima. L'opzione "Zona morta" vi aiuterà a trovare la posizione della telecamera quando dovrebbe guardare esattamente davanti. Un'impostazione molto alta della zona morta comporterà un grande movimento del mouse prima di poter ruotare la telecamera, mentre un'impostazione bassa farà muovere la telecamera al minimo movimento del mouse, senza segnare una differenza quando si passa dal centro. Ms XY farà le stesse cose, solo che la telecamera si muoverà anche verso l'alto e verso il basso.
Visuale: [graduale / Istantaneo]
Questa impostazione definirà il comportamento della telecamera quando vengono premuti i tasti "guarda a SX" e "guarda a DX". Quando viene premuto un tasto, l'impostazione graduale porterà gentilmente la telecamera a guardare verso la direzione impostata, mentre l'impostazione istantanea punterà la telecamera direttamente verso la direzione segnalata, senza dare una sensazione di movimento.
Impostazione della telecamera personalizzata
(Nota: Ogni telecamera personalizzata impostata è salvata in base alla vettura. In questo modo potrete avere diverse impostazioni per ogni macchina.)
Andate nel menu Visuali e cliccate cliccate su "personalizzato" alla voce "visuale predefinita". Noterete che le opzioni disponibili ora chiamate "impostazioni per personalizzato" sono cambiate leggermente.
Draw (main): [None / Wheels / Body]
Sets how the car around you should be drawn while driving around normally. 'None' means nothing is drawn, 'wheels' draws - you probably guessed it - only the wheels and 'body' draws the whole car interior.
Draw (look): [None / Wheels / Body]
Sets how the car around you should be drawn while using the look function. Same logic as for 'Draw (main)' applies.
Acceleration shifts viewpoint: [On / Off]
This extra option to turn off the viewpoint shifting under acceleration allows you to have a fixed camera for custom view, while still allowing a moving camera for the in-car view.
The X offset, Y offset and Z offset:
The most important settings of a custom view, define the custom camera's position. X offset moves the camera left and right, Y offset moves the camera forwards and backwards and Z offset moves the camera up and down. If you adjust this while the car is on track, two extra buttons will appear, namely 'Centre view' and 'Eye position'. Clicking the former will reset the offsets to 0.0, while pressing the latter will set them to the values similar to what you see in in-car view.
When you are done setting up a custom camera, click in car again in the Default driver view option if you want the default view to be used as the standard view. Though, if you are happy with the new custom view, keep it on custom so it will always be used as the primary view.
View buttons and shortcuts
V : Switches through the cameras.
SHIFT + V : Switches back through the cameras.
TAB : Switches to the next car.
SHIFT + TAB : Switches to the previous car.
HOME : Switches to your own car.
SHIFT + F1 : Returns to the default view specified in the View options.
SHIFT + F : Removes the display showing only graphics and text messages.
SHIFT + M : Changes between mirror modes. (No mirrors, only real mirrors or real mirrors + a virtual mirror.)
SHIFT + U : Switches to the AutoX editor/Free view -mode.
Display
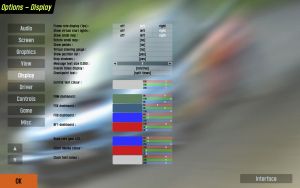
Here we can change the speedo, type of mirror used, add a map of where we are on the track.
Frame rate display: [Off / Left / Right]
You can choose to have your frame rate (fps) displayed or not, and on which side of the screen.
Show virtual start lights: [Off / Left / Right]
Sets whether the start lights at the beginning of a race should be displayed in an extra box. This can help when starting from the back of larger fields where the start lights might be hard to see.
Show small map: [Off / Left / Right]
Controls if the small overview track map should be displayed, and on which side.
Rotate small map: [Yes / No]
Sets whether the small track map rotates so the triangle of your car always points upwards, or if it is stationary.
Digital speedo: [Yes / No]
Sets if the speedo is digital or analogue. Note that the speed is measured at the wheels, which means it is not 100% accurate. For example when doing a burnout or when locking the wheels during braking, the speedo can show too high respectively too low values.
Show pedals: [Yes / No]
Enables or disables the displaying of the virtual 'pedals' in the lower right corner. These can be useful for wheels with calibration problems, so you can see if depressing your pedal fully is also recognized as 100% ingame. A little white bar at the top of the pedal bar signalizes 100% controller input. The colours for the bars are: Green = throttle, Red = brakes, Blue = clutch, Gray = handbrake.
Virtual steering gauge: [Yes / No]
Turns the virtual steering gauge (white curved bar with a red rectangle showing the current wheel position) at the middle bottom of the screen on or off. Can be useful to determine if the wheel is calibrated correctly.
Show position list: [Yes / No]
Sets if the driver position list in the lower right corner should be displayed during the race.
Drop shadows: [Yes / No]
Enables or disables shadows behind the text to improve readability.
Message text size:
Adjusts the text displayed in game etc. Default: 0.040
Overall times display: [Relative / Absolute]
Affects the race results display. Sets whether the 'Total' time should be absolute for each driver, or relative to the winner of the race. For example, on 'absolute' setting it would look like this
- AI 1: 3:05.27
AI 2: 3:07.56
AI 3: 3:11.46
and with 'relative' setting for the same times like this
- AI 1: 3:05.27
AI 2: +0:02.29
AI 3: +0:06.19
Manual shift indicator: [Yes / No]
Enables or disables the shift indicator. If enabled, a small red light near the tachometer will light up when the ideal shift point is reached (which is once the next gear would yield more torque than the current gear). Only works on upshifts.
Various colours:
Lets you set up a variety of dashboard related colours. Even more colours can be set up in the 'Interface' menu.
Interface:
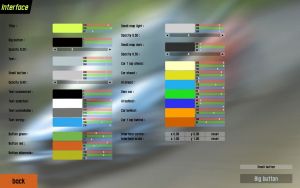
This button opens a new list of options which allow you to control and customise the colours and opacities of the buttons and text used throughout Live for Speed.
Interface
Big opacity:
This controls the opacity (transparency) of the large buttons, e.g. on the main menu.
Big colour:
The underlying colour of the main buttons.
Big text:
The colour of the text (not affected by opacity).
Button opacity:
Affects smaller buttons.
Button colour:
Affects smaller buttons.
Text unselected:
The colour of text on menus where highlighting occurs (e.g. options or garage).
Text selected:
The selected colour of text, as above.
Text unavailable:
Visible text that cannot be selected.
Text string:
Used on some buttons with user-editable text (like hostname or password), or for example for available but not yet completed training lessons.
Title colour:
The colour of the text in the top left of the menus. Also controls highlighting of fastest laps etc in race result lists.
Button green:
Shade for 'green' buttons.
Button red:
Shade for 'red' buttons.
Button alternate:
Shade for buttons used to indicate that pressing the button has no effect, or if an alternate third colour is needed. For example when going to the track selection screen, as long as you don't select a different track than currently loaded, the OK button will have this colour.
Small map light:
Colour of the small track map, when drawn against a most likely dark background (used for example at in-car view if the car has a roof).
Small map dark:
Colour of the small track map, when drawn against a most likely light background (used for example at in-car view if the car has no roof, or for the TV camera view)
Car 1 lap ahead:
Colour of a car more than one lap ahead (on the small track map).
Car ahead:
Colour of a car ahead of you.
AI ahead:
Colour of an AI car ahead of you.
Own car:
Colour of your own car.
AI behind:
Colour of an AI car behind you.
Car behind:
Colour of a car behind you.
Car 1 lap behind:
Colour of a car more than one lap behind you.
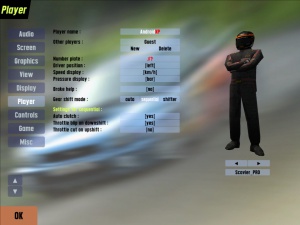
Player
In this menu, details such as screen name, number plate text, etc. can be added. Here you can also select your driver, Male or Female, complete with helmet and racing suit and add to your car’s cockpit. Your selected screen name will always appear next to the player button, you can also change helmet and helmet colors.
Brake help: [Yes / No]
Turns brake help on or off. If turned on, a very simple form of ABS tries to help keeping the car under control while braking, but it can increase the overall braking distance.
Gear shift mode: [Auto / Sequential / Shifter]
Sets the shift mode. 'Auto' makes the computer change gears for you, which is good for beginners, but rather slow. 'Sequential' means you use paddles or a sequential gearstick and 'shifter' should be selected when you use a custom built shifter, or for example the one that comes with the Logitech G25 wheel.
Only available if 'sequential' or 'shifter' are selected:
Auto clutch: [Yes / No]
Sets if the clutch should be operated automatically during shifting or if you have to do the footwork yourself. However, setting this to 'no' does not disable the automatic clutch that kicks in to prevent stalling. This will probably change in the future when stalling is properly implemented.
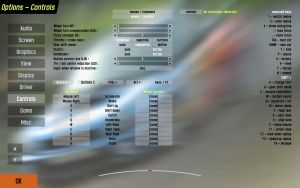
Controls
Mouse/Keyboard
Keyboard steer: [Keyboard - no help / Keyboard - stabilised / Mouse steer]
This is how you select your input method:
- Keyboard - no help directly translates button presses into wheel movement. So long as the button is held down, the wheel will continue turning until it reaches maximum lock. There is an auto return to centre function when no steering keys are pressed. Both rates are configurable. Also, pressing both left and right will hold the wheel in its current position. This steering method is definitely not recommended, since it is impractically difficult to race with.
- Keyboard - stabilised has two main differences to "keyboard - no help". Firstly, it limits the movement of the wheel depending on the amount of grip the tyres have. This limit is also adjustable. Secondly it adds a small amount of automatic counter-steering to help balance the car. While this is a driving aid (and the turn limit can be considered one as well), it is essential for using such a basic input device for a task it obviously would never be used to do in real life. Thankfully the keyboard steering is highly configurable in LFS so you should be able to get it to work to your preference.
- Mouse steer (rather obviously) lets you use the mouse for steering and assign throttle and brake to buttons (be they on your keyboard or your mouse).
Auto gear shift: [Yes / No]
If enabled, the computer will change gear for you (and probably at the wrong time too).
Button control rate:
This is for when you assign a button to an analogue control (e.g. handbrake or clutch) how fast the control moves when the button is pressed. Higher is faster.
Mouse steer only:
Steer centre reduction:
This is a non-linearity slider and is designed to make it easier to control the car buy reducing straight line twitchyness. A setting of 0.0 gives fully linear steering whereas a setting of 1.0 gives fully non-linear steering. A setting of 0.4 to 0.6 is recommended.
Keyboard steer only:
Steer rate:
The speed the wheel turns when you press the left or right steer buttons. Higher values will make the car more responsive but less stable, and vice versa.
Return rate:
The speed the wheel turns when you depress the left or right steer buttons. Higher values will make the car more responsive but less stable, and vice versa. It is usual to use a lower value for the return rate, between 50 to 75% of the steer rate.
Fast steer multiplier:
When holding the "Steer Fast" key, the steer rate will be temporarily increased. This slider controls by what percentage it will be increased. With the default setting of 2.00, the steer rate will be doubled. This fast steering option can be useful when quick corrections are needed, such as when counter-steering. Chances are you're going to crash anyway so this option is of limited helpfulness.
Slow steer multiplier:
When holding the "Steer Slow" key, the steer rate will be temporarily reduced. This slider controls by what percentage it will be reduced. With the default setting of 0.50, the steer rate will be halved. This slow steering option is most useful at higher speeds when finer control over the vehicle is needed. However the keyboard steering is automatically speed sensitive, so there is really no need to ever use this anyway.
Limit multiplier: (Only available with 'Keyboard - stabilised')
A setting of 1.0 limits the wheel turn to that of the available grip of the tyres. Settings higher than this allow you to turn further, to induce understeer. Settings lower than 1.0 means you won't get so close to the limits of the car, so control is retained. The further you reduce this setting, the easier the car will be to drive, at the sacrifice of cornering speed.
In the Buttons 1 subsection you select which button to assign to the function labelled to the right of the button. To choose and lock in your selection, simply click on the button to highlight it, a text message with instructions will appear at bottom of screen, Click desired button or key you wish to associate with this button etc. Do this for all Button 1 selections, then move on to Button 2 section using the same method to select and assign your desired keys or buttons to control the views etc.
When you have completed this, mouse users and keyboard users are finished, and may want to skip the section on wheels and joysticks. And go directly to the far right of this screen and look closely at the various key sequences and what they do. i.e. (Reserved keys) and Shift + combinations.
Wheel/Joystick
This section provides different options additional to the previous section. Existing keyboard and mouse settings can still be used just by clicking on the Mouse/KB button. This is useful if your wheel breaks or springs in pedal fall apart.
After selecting to enable your wheel you will need to set it up for maximum efficiency depending on the make and whether is has force feedback functions etc some options will not be needed or may be used if desired. Please note that you might have to change some settings in the drivers of your wheel manufacturer, e.g. to enable split axes.
Wheel turn:
Adjusts the sensitivity of the virtual driver's animation when turning the virtual steering wheel. Set to the actual degrees of rotation of your steering wheel controller for best results.
For the steering wheel turns for each car, see this page.
Wheel turn compensation:
Adjusts the turn ratio of the users wheel to the LFS car.
Force strength:
For FF users, higher settings mean more feedback. Just try what suits best to you.
Throttle/brake axis:
Can be one of three different states:
Combined: The brake and throttle use the same axis
Separate: The brake and throttle use one axis each for their settings
Button: The brake and throttle use can be assigned to a button or a paddle
Gear shift mode:
We have discussed earlier the three types and their use.
Clutch & Handbrake:
Can be assigned to any spare axis or button if you wish.
Button control rate:
Sets the sensitivity of the buttons when mapped to analog inputs. For example, the higher the rate, the faster the handbrake is applied when assigned to a button. Choose Display>Show pedals in order to see this option affect the speed at the which the handbrake (grey bar) is applied.
Throttle/brake centre reduction:
Adjusts the sensitivity of the throttle and brake and the point at which it starts to apply.
Setting up the wheel
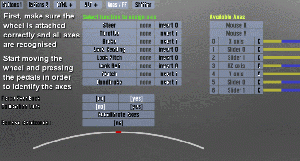
This is the area where wheel and joystick users get to assign the axis. Again most of these options are largely click-and-set buttons.
Please make sure your equipment is attached to the computer and Windows has found the device and it has been set up in Control Panel / Game Controller area. Run your profiler software if needed and deselect combined axis at driver level if necessary (for example: Logitech Profiler). Calibrate using Windows software before attempting to setup in LFS. It is essential you have the latest wheel drivers and DirectX version installed, or the wheel might not work properly.
- Set throttle and brake axes to "separate", or "combined" if your wheel doesn't support the former
- (You may have to change this setting in the wheel software, too! See the "Before you start" section)

- In the middle of the screen a list of functions, and on the right a list of available axes will show up. Start rotating the wheel and pressing the pedals on your controller. If everything has been set up correctly so far, the blue/yellow bars on the far right will begin to move, representing the current controller input. If this is NOT the case, the fault is somewhere outside of LFS - see the "Before you start" section above.
- With the axes list still open, you can now start assigning the different functions to the available axes. To do this, first click on the function you want to assign (e.g. "Steer"), then click on the axis you want to assign it to (e.g. "X axis"). Unlike in many other games, pressing the pedal or rotating the wheel after clicking on the function button will NOT assign the axis automatically!
- After all necessary functions have been assigned, check if LFS reads the input correctly by rotating the wheel and pressing the pedals again. Now the steering indicator and pedal bars will move, too. If an axis/function operates the opposite way it should, click on the "invert" button found to the right of the function in question.
- See also: How to assign functions to controller axes (animated gif)
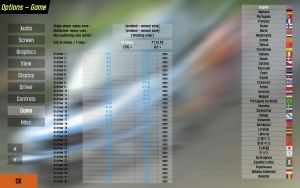
Game
Here we set some minor options such as the automatic/manual saving of races, the finishing order for race restarts etc - We can substitute names for the AI, maybe we want to race against Peter Brock or Michael Schumacher? Just click to cycle through the available options of each selection. The most important feature however, is the ability to add to the F1 - F8 keys of your own custom messages, such as “Sorry”, Hello, etc for use when in game and too busy to type a reply etc. To do this, select the "F1 to F8" button and in the space next to the selected key, click to open, then type in your message text, click OK to save. There is a limit on length etc, but most short messages can be written.
On the right side of this page you can select the language used in LFS.
Single player replay save: [Not enabled / Enabled / Auto save]
Sets how replays should be handled. Not enabled means there are no replays recorded, ever. Enabled means replays are recorded, but you have to save them manually (ingame, hit "1" to save with automatically generated name, or hit "2" to save with custom name). Automatic means that every replay is saved with an automatically generated name, without requiring you to do anything.
Multiplayer replay save:
See single player replay save.
Non-qualifying race restart:
Sets how race (re)starts that had no prior qualifying should be handled. The options are self explanatory.
Edit AI names / F keys:
- AI names: Self explanatory.
- F1 to F8: Click on the spaces/buttons right to the desired key to define the text to say on hitting the corresponding key. The codes in there are the same as if hitting "T" (to talk) ingame.
- CTRL +: Same as behaviour as in "F1 to F8", but defines the actions when hitting CTRL plus the desired key at the same time. Additionally you have access to keys F9 - F12 here.
- ALT +: See 'CTRL +', but instead with the ALT key.
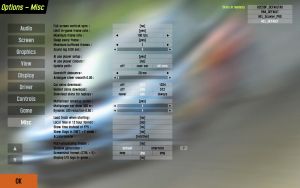
Misc
There are twenty different options here! Including some things that make a difference to game play and frame rates.
Full screen vertical sync: [Yes / No]
Turns VSync on or off.
Limit frame rate in game: [Yes / No]
This is used in conjunction with the next option to set what max frame rate to use.
Maximum frame rate:
Here you can set a minimum / maximum number of frames for use in game – depends upon the previous setting to enable/disable.
Minimum sleep:
This setting forces LFS to sleep/wait the set amount of time between each frame, to allow Windows to update controller inputs, etc. Increase this value if you're having problems with controller stuttering/lag or similar. Don't put it too high, though, as it will also limit your maximum framerate.
Sound lag:
Because the program has to play the sound slightly in advance, so that there are no gaps in the sound. Recommended setting is as low as possible without hearing stutters or gaps in the sound.
AI use player setup: [Yes / No]
Self Explanatory
AI use player colours: [Yes / No]
Self Explanatory
Update path: [Off / User car / All cars]
This determines which cars update the racing groove on the track.
Gearshift debounce:
Sets the time in milliseconds that must elapse before another (sequential) gear change is accepted. On some wheels when they get old, the paddles start to sometimes report two very quick presses instead of one. This setting tries to cure the annoying behaviour by ignoring quick shift commands. If you suffer from these so called double shifts, increase this value - if on the other hand you seem to miss gear shifts when quickly shifting yourself, decrease it.
Analogue steer smooth:
Sets the amount of smoothing for joysticks and some wheels. The higher the value, the smoother your inputs will be, but they will also lag behind slightly.
Car skins download: [Off / 512 / 1024]
Controls the automatic downloading of car skins for licensed users. The 1024 option requires you to have money credits on your Live For Speed account, and costs £1 for 2000 'hi-res' skins. If you run out of credit LFS will give a warning message, and then stop downloading skins. It will not resort to 512 mode. Default: 512
Helmet skins download: [Off / 256 / 512]
Controls the automatic downloading of helmet skins for licensed users. The 512 option requires you to have money credits on your Live For Speed account, and costs £1 for 2000 'hi-res' skins. If you run out of credit LFS will give a warning message, and then stop downloading skins. It will not resort to 256 mode. Default: 256
Download skins for replays: [Never / Ask / Always]
Sets whether the program will never download skins in replay files, will prompt if you do not have the skin, or always download missing skins automatically. Default: Ask
Multiplayer speedup option: [Yes / No]
This option makes the distant cars use less CPU power by not updating their physics or drawing them at all.
Multiplayer car draw: (Only visible when 'Multiplayer speedup option' is enabled)
Sets the distance the cars are drawn. Use a lower value for better performance.
Dynamic LOD reduction:
Sets the value for the dynamic change of "Level of Detail". Zero means no, and one is full dynamic LOD reduction. This makes the Level of Detail change dynamically depending on how many cars are visible and on your current framerate. Use higher values if you experience slowdowns when multiple cars are visible.
Performance: 1.00 | Quality: 0.00
Load track when starting: [Yes / No]
If disabled, the startup time of LFS will be considerably decreased.
Local time in 12 hour format: [Yes / No]
Self Explanatory
Show time instead of FPS: [Yes / No]
If on, the FPS display (see Options - Display) will be replaced with the local time.
Show flags in SHIFT+F mode: [Yes / No]
If enabled, blue and yellow flags are still displayed if the interface rendering has been disabled with Shift+F.
External links
- Custom music in LFS guide at RSC forums
