Difference between revisions of "Options"
m (→View: +view lock {{option}}s) |
|||
| (22 intermediate revisions by 2 users not shown) | |||
| Line 47: | Line 47: | ||
[[Image:Graphicsmax.jpg|thumb|Maximum graphic settings]] | [[Image:Graphicsmax.jpg|thumb|Maximum graphic settings]] | ||
[[Image:Graphicsmin.jpg|thumb|Minimum graphic settings]] | [[Image:Graphicsmin.jpg|thumb|Minimum graphic settings]] | ||
| − | |||
| − | |||
| − | |||
| − | |||
The options in this setup screen allow you to control the graphics quality. Fine tuning of these options can raise the frame rate or improve the image-quality. Turning off some of the options can vastly improve the gaming experience on some computers that are not quite 'up-to-date'. | The options in this setup screen allow you to control the graphics quality. Fine tuning of these options can raise the frame rate or improve the image-quality. Turning off some of the options can vastly improve the gaming experience on some computers that are not quite 'up-to-date'. | ||
| Line 90: | Line 86: | ||
;Mip bias ... grass / gravel{{colon}} | ;Mip bias ... grass / gravel{{colon}} | ||
;Mip bias ... road surfaces{{colon}} | ;Mip bias ... road surfaces{{colon}} | ||
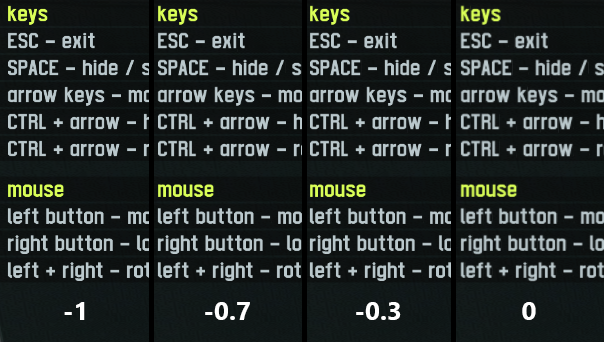
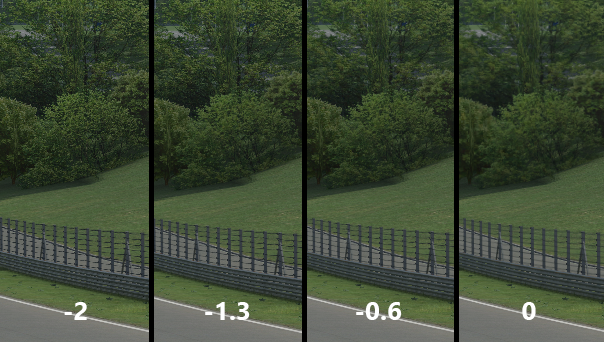
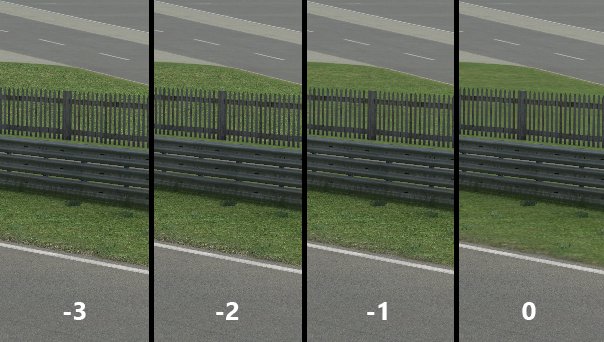
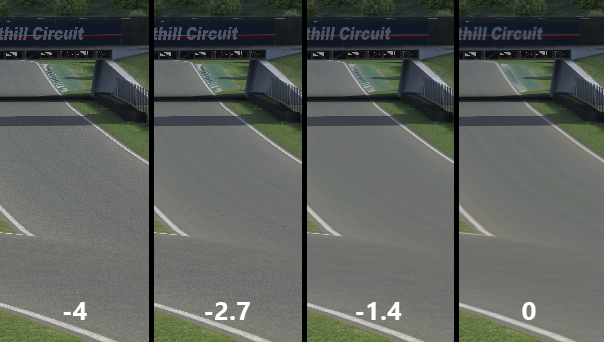
| − | :In short, a sort of blurring effect is applied at a distance set by the sliders. Move the slider left for a sharper appearance and to reduce blurring, move it to the right for a smoother appearance and to reduce shimmering. The question mark next to this option explains what these options do in more detail. See thumbnails for samples to see what these sliders do. | + | :In short, a sort of blurring effect is applied at a distance set by the sliders. Move the slider left for a sharper appearance and to reduce blurring, move it to the right for a smoother appearance and to reduce shimmering. The question mark next to this option explains what these options do in more detail. See thumbnails for samples to see what these sliders do (top left: interface / text, top right: objects / walls, bottom left: grass / gravel, bottom right: road surfaces). |
| + | |||
| + | [[Image:Mipbias interface text samples.png|Mip bias: interface / text]] [[Image:Mipbias objects walls samples.png|Mip bias: objects / walls]] | ||
| + | |||
| + | [[Image:Mipbias grass gravel samples.png|Mip bias: grass / gravel]] [[Image:Mipbias road surfaces samples.png|Mip bias: road surfaces]] | ||
| + | |||
;Textures (excluding skins){{colon}} {{option|low res|high res}} | ;Textures (excluding skins){{colon}} {{option|low res|high res}} | ||
:Sets if textures should be used in full resolution or downsized. Selecting 'low res' will decrease texture usage considerably and can help increasing performance on older graphics cards. | :Sets if textures should be used in full resolution or downsized. Selecting 'low res' will decrease texture usage considerably and can help increasing performance on older graphics cards. | ||
| Line 117: | Line 118: | ||
;Field of view{{colon}} | ;Field of view{{colon}} | ||
:The width of the view you are presented in game, also known as the amount of zoom. A smaller field of view will result in a closer look at what's in front, but will show less of what's beside you which is also important. A larger field of view will result in good view around you but a distant view what's in front of you. It's up to you to define a balance here, try and adjust the slider till it comforts you. The default value is around 90°. | :The width of the view you are presented in game, also known as the amount of zoom. A smaller field of view will result in a closer look at what's in front, but will show less of what's beside you which is also important. A larger field of view will result in good view around you but a distant view what's in front of you. It's up to you to define a balance here, try and adjust the slider till it comforts you. The default value is around 90°. | ||
| + | ;View offset{{colon}} | ||
| + | :View offset | ||
| + | ;Multiple screen layout{{colon}} | ||
| + | :Multiple screen layout | ||
| + | ;One button look{{colon}} | ||
| + | :One button look | ||
| + | ;View lock{{colon}} {{option|Car|Filter|Horizon}} | ||
| + | :View lock type [[Image:View lock options.gif|none]] | ||
;Pitch view{{colon}} | ;Pitch view{{colon}} | ||
:The vertical direction of the camera can be selected here, it can aim upwards with a positive value, or it can aim downwards with a negative value. | :The vertical direction of the camera can be selected here, it can aim upwards with a positive value, or it can aim downwards with a negative value. | ||
| Line 196: | Line 205: | ||
:and with 'relative' setting for the same times like this | :and with 'relative' setting for the same times like this | ||
:AI 1: 3:05.27<br>AI 2: +0:02.29<br>AI 3: +0:06.19 | :AI 1: 3:05.27<br>AI 2: +0:02.29<br>AI 3: +0:06.19 | ||
| + | ;Checkpoint text{{colon}} {{option|split times|none}} | ||
| + | :Enable or disable the on-screen split times appearing when crossing a split/checkpoint line. | ||
| + | ;Extra status info{{colon}} {{option|CT (clutch temp)|engine|fuel|accelerometer}} | ||
| + | :Extra info to show in F9, F10 menus. All four options can be toggled individually. | ||
| + | ;Accelerometer{{colon}} {{option|relative|absolute}} | ||
| + | :Data display method for accelerometer in F9 and F10 overlays in-game. Only shown if it is active in the previous option, "Extra status info". | ||
;Manual shift indicator{{colon}} {{option|no|yes}} | ;Manual shift indicator{{colon}} {{option|no|yes}} | ||
:Enables or disables the shift indicator. If enabled, a small red light near the tachometer will light up when the ideal shift point is reached (which is once the next gear would yield more torque than the current gear). Only works on upshifts. | :Enables or disables the shift indicator. If enabled, a small red light near the tachometer will light up when the ideal shift point is reached (which is once the next gear would yield more torque than the current gear). Only works on upshifts. | ||
| Line 257: | Line 272: | ||
;Brake help{{colon}} {{option|no|yes}} | ;Brake help{{colon}} {{option|no|yes}} | ||
:Turns brake help on or off. If turned on, a very simple form of ABS tries to help keeping the car under control while braking, but it can increase the overall braking distance. | :Turns brake help on or off. If turned on, a very simple form of ABS tries to help keeping the car under control while braking, but it can increase the overall braking distance. | ||
| − | ;Gear shift mode{{colon}} {{option|auto| | + | ;Gear shift mode{{colon}} {{option|auto|sequential|shifter}} |
:Sets the shift mode. 'Auto' makes the computer change gears for you, which is good for beginners, but rather slow. 'Sequential' means you use paddles or a sequential gearstick and 'shifter' should be selected when you use a custom built shifter, or for example the one that comes with the Logitech G25 wheel. | :Sets the shift mode. 'Auto' makes the computer change gears for you, which is good for beginners, but rather slow. 'Sequential' means you use paddles or a sequential gearstick and 'shifter' should be selected when you use a custom built shifter, or for example the one that comes with the Logitech G25 wheel. | ||
| Line 316: | Line 331: | ||
;Force strength{{colon}} | ;Force strength{{colon}} | ||
:For FF users, higher settings mean more feedback. Just try what suits best to you. | :For FF users, higher settings mean more feedback. Just try what suits best to you. | ||
| − | ;Throttle/brake | + | ;Throttle/brake axes{{colon}} {{option|combined|separate|button}} |
:Can be one of three different states:<br> | :Can be one of three different states:<br> | ||
:Combined: The brake and throttle use the same axis<br> | :Combined: The brake and throttle use the same axis<br> | ||
| Line 329: | Line 344: | ||
;Throttle/brake centre reduction{{colon}} | ;Throttle/brake centre reduction{{colon}} | ||
:Adjusts the sensitivity of the throttle and brake and the point at which it starts to apply. | :Adjusts the sensitivity of the throttle and brake and the point at which it starts to apply. | ||
| + | |||
| + | ==== Axes / FF ==== | ||
| + | This tab allows for assigning functions to your device's axes (see section [[#Setting up the wheel|Setting up the wheel]] below), and also contains some options for limiting range, force feedback refinement, inversion of axes and toggling of deadzones. Limiting the range of an axis comes handy as a quick solution, when your device reports values that are stuttering (due to a dirty pot), or are not physically reachable at all (on the edge of the full motion range). It could also be useful for simulating a different clutch behaviour. | ||
| + | |||
| + | ;Force feedback{{colon}} | ||
| + | :Main switch to enable or disable force feedback (if supported by your controller device). | ||
| + | ;FF Steps{{colon}} | ||
| + | :Resolution of force feedback (the number of different values that can be used to feed back force). Maximum is 10000, a limit of DirectInput. For low-end wheels with gears/belts, lower values (around 400) are recommended, while for high-end direct drive FF wheels you may wish to go for maximum. This will give you the maximum number of updates from LFS physics, at the maximum resolution allowed by DirectInput. Scawen said: "on lower end wheels (standard wheels with gears or belts) there will not be so much benefit in going for these high update rates and there may be a CPU cost and possibly lag if you go for the full unlimited rate. So I suggest you don't go higher than you need if the difference is not noticeable on your wheel."{{ref|1}}{{ref|2}}{{ref|3}}{{ref|4}} | ||
| + | ;FF Rate{{colon}} | ||
| + | :Update rate of force feedback, in Hertz. See FF Steps above for more info and recommendations.{{ref|1}}{{ref|2}}{{ref|3}}{{ref|4}} | ||
| + | ;Remove deadzones{{colon}} | ||
| + | :Remove/ignore deadzones of the controller. | ||
=== Setting up the wheel === | === Setting up the wheel === | ||
| − | [[ | + | [[Image:HowToAssignAxis_Ani.gif|right|How to assign functions to controller axes (animation)]] |
This is the area where wheel and joystick users get to assign the axis. Again most of these options are largely click-and-set buttons. | This is the area where wheel and joystick users get to assign the axis. Again most of these options are largely click-and-set buttons. | ||
| Line 342: | Line 369: | ||
<div style="font-size:116%; font-weight: bold; padding-bottom:0.17em; padding-top:0.5em;"> | <div style="font-size:116%; font-weight: bold; padding-bottom:0.17em; padding-top:0.5em;"> | ||
1) Wheel settings</div> | 1) Wheel settings</div> | ||
| − | :Set the controller mode to | + | :Set the controller mode to {{button|wheel / joystick|light}}<br/> |
| − | :[[image:Controls_mode.jpg|Controller mode set to "wheel / | + | :[[image:Controls_mode.jpg|Controller mode set to "wheel / joystick"]] |
| − | :Set throttle and brake axes to | + | :Set throttle and brake axes to {{button|separate|light}}, or {{button|combined|light}} if your wheel doesn't support the former<br/> |
:(You may have to change this setting in the wheel software, too! See the "Before you start" section)<br/> | :(You may have to change this setting in the wheel software, too! See the "Before you start" section)<br/> | ||
:[[image:Controls_throttlebrake.jpg|Throttle / brake axes set to "separate"]] | :[[image:Controls_throttlebrake.jpg|Throttle / brake axes set to "separate"]] | ||
| − | :If you have a clutch pedal, set the clutch option to | + | :If you have a clutch pedal, set the clutch option to {{button|axis|light}}, otherwise {{button|button|light}}<br/> |
:[[image:Controls_clutch.jpg|Clutch set to "axis"]] | :[[image:Controls_clutch.jpg|Clutch set to "axis"]] | ||
<div style="font-size:116%; font-weight: bold; padding-bottom:0.17em; padding-top:0.5em;"> | <div style="font-size:116%; font-weight: bold; padding-bottom:0.17em; padding-top:0.5em;"> | ||
2) Verify axes are correctly detected by LFS</div> | 2) Verify axes are correctly detected by LFS</div> | ||
| − | :First, click on the | + | :First, click on the {{button|Axes / FF|light}} button to open the axis assignment view<br/> |
:[[image:Controls_axes.jpg|"Axes / FF" selected]] | :[[image:Controls_axes.jpg|"Axes / FF" selected]] | ||
| Line 363: | Line 390: | ||
:With the axes list still open, you can now start assigning the different functions to the available axes. To do this, first click on the function you want to assign (e.g. "Steer"), then click on the axis you want to assign it to (e.g. "X axis"). Unlike in many other games, pressing the pedal or rotating the wheel after clicking on the function button will '''NOT''' assign the axis automatically! | :With the axes list still open, you can now start assigning the different functions to the available axes. To do this, first click on the function you want to assign (e.g. "Steer"), then click on the axis you want to assign it to (e.g. "X axis"). Unlike in many other games, pressing the pedal or rotating the wheel after clicking on the function button will '''NOT''' assign the axis automatically! | ||
| − | :After all necessary functions have been assigned, check if LFS reads the input correctly by rotating the wheel and pressing the pedals again. Now the steering indicator and pedal bars will move, too. If an axis/function operates the opposite way it should, click on the "invert" button found to the right of the function in question. | + | :After all necessary functions have been assigned, check if LFS reads the input correctly by rotating the wheel and pressing the pedals again. Now the steering indicator and pedal bars will move, too. If an axis/function operates the opposite way it should, click on the "invert" button found to the right of the function in question. If, for some reason you need to limit the range of some axes, you can do so by adjusting the range values (0-100% for both range ends). |
| − | |||
| − | |||
| − | |||
=== Setting up clutch & H-Shifter === | === Setting up clutch & H-Shifter === | ||
| Line 377: | Line 401: | ||
[[:Image:G27_shifter_config.png|Click for a screenshot compilation of all the above options]] | [[:Image:G27_shifter_config.png|Click for a screenshot compilation of all the above options]] | ||
| − | |||
'''How to shift gears:''' | '''How to shift gears:''' | ||
| Line 440: | Line 463: | ||
:Sets the value for the dynamic change of "Level of Detail". Zero means no, and one is full dynamic LOD reduction. This makes the Level of Detail change dynamically depending on how many cars are visible and on your current framerate. Use higher values if you experience slowdowns when multiple cars are visible.<br> | :Sets the value for the dynamic change of "Level of Detail". Zero means no, and one is full dynamic LOD reduction. This makes the Level of Detail change dynamically depending on how many cars are visible and on your current framerate. Use higher values if you experience slowdowns when multiple cars are visible.<br> | ||
:''Performance: 1.00 | Quality: 0.00'' | :''Performance: 1.00 | Quality: 0.00'' | ||
| + | ;Full physics for remote cars{{colon}} {{option|yes|no}} | ||
| + | :If enabled, all cars on track will use high-resolution physics. This is helpful to eliminate little stutters in car movement when a lot of cars are shown. On the other hand, this doubles CPU usage by physics in multiplayer! If you have low FPS and generally a weaker computer, disable this. If disabled, only the nearest four cars use full physics on your screen. Introduced in 0.7D7/0.7E. | ||
| + | :''Performance: no | Quality: yes'' | ||
;Load track when starting{{colon}} {{option|yes|no}} | ;Load track when starting{{colon}} {{option|yes|no}} | ||
:If disabled, the startup time of LFS will be considerably decreased. | :If disabled, the startup time of LFS will be considerably decreased. | ||
| Line 448: | Line 474: | ||
;Show flags in SHIFT+F mode{{colon}} {{option|yes|no}} | ;Show flags in SHIFT+F mode{{colon}} {{option|yes|no}} | ||
:If enabled, blue and yellow flags are still displayed if the interface rendering has been disabled with {{key press|Shift|F}}. | :If enabled, blue and yellow flags are still displayed if the interface rendering has been disabled with {{key press|Shift|F}}. | ||
| − | ; | + | ;Allow regional downloads{{colon}} {{option|yes|no}} |
| − | : | + | :When enabled, you will be redirected to the nearest LFS server to downloads vehicle mods from. Otherwise if disabled, downloads will be retrieved only from the main LFS server (may take longer). Allowing regional downloads should make downloads faster, but if you experience any problems/errors when using mods, try disabling this. |
;Post-processing shader{{colon}} {{option|yes|no}} | ;Post-processing shader{{colon}} {{option|yes|no}} | ||
:If enabled, the ps_main shader in {{Folder|data|shaders|PostProcess.psh}} is used to create the final image. The post-processing shader is set to S-SHAPE by default. At first glance, it looks like the setting just increases the contrast, when in fact it's just a placeholder "demo" for a shader, located in {{Folder|data|shaders|PostProcess.psh}} and there are more examples in that file. You are supposed to create your own shader to use with LFS. Only enable if you know what you are doing (by default, this is NOT an option for maxing out graphics settings). While enabling the default placeholder shader might make the LFS have more contrast and you might like it, LFS is not meant to look like that by default. | :If enabled, the ps_main shader in {{Folder|data|shaders|PostProcess.psh}} is used to create the final image. The post-processing shader is set to S-SHAPE by default. At first glance, it looks like the setting just increases the contrast, when in fact it's just a placeholder "demo" for a shader, located in {{Folder|data|shaders|PostProcess.psh}} and there are more examples in that file. You are supposed to create your own shader to use with LFS. Only enable if you know what you are doing (by default, this is NOT an option for maxing out graphics settings). While enabling the default placeholder shader might make the LFS have more contrast and you might like it, LFS is not meant to look like that by default. | ||
| Line 457: | Line 483: | ||
:When you press {{Key press|CTRL|S}}, a screenshot is saved to {{folder|data|shots}}. You define the screenshot file format here, PNG recommended. BMP usually results in a much higher file size with high quality, JPG compresses the image a bit to save space sacrificing quality, PNG is lossless but with a usually smaller file size than BMP. | :When you press {{Key press|CTRL|S}}, a screenshot is saved to {{folder|data|shots}}. You define the screenshot file format here, PNG recommended. BMP usually results in a much higher file size with high quality, JPG compresses the image a bit to save space sacrificing quality, PNG is lossless but with a usually smaller file size than BMP. | ||
;Display LFS logo in-game{{colon}} {{option|yes|no}} | ;Display LFS logo in-game{{colon}} {{option|yes|no}} | ||
| − | :Enable or disable the LFS logo in the top left corner of the screen. You can only disable it you are S1 licensed or higher. | + | :Enable or disable the LFS logo in the top left corner of the screen. You can only disable it if you are S1 licensed or higher. |
==External links== | ==External links== | ||
*[http://www.google.com/search?q=cache:6eFxU3W6oIMJ:forum.rscnet.org/archive/index.php%3Ft-207151.html Custom music in LFS] guide at RSC forums | *[http://www.google.com/search?q=cache:6eFxU3W6oIMJ:forum.rscnet.org/archive/index.php%3Ft-207151.html Custom music in LFS] guide at RSC forums | ||
| + | |||
| + | == References == | ||
| + | {{references | ||
| + | |{{cite web |url=https://www.lfs.net/forum/post/1949764#post1949764 |title=Scawen's comments on FF Steps and FF Rate (1, thread "Test Patch U16: Updates and fixes") |date=July 21, 2019 |website=LFS Forum |access-date=October 13, 2014}} | ||
| + | |{{cite web |url=https://www.lfs.net/forum/post/1975713#post1975713 |title=Scawen's comments on FF Steps and FF Rate (2, thread "LFS Mods [TEST VERSION] Introduction and Discussion") |date=December 9, 2021 |website=LFS Forum |access-date=October 13, 2014}} | ||
| + | |{{cite web |url=https://www.lfs.net/forum/post/1949754#post1949754 |title=Scawen's comments on FF Steps and FF Rate (3, thread "OSW notchy FFB") |date=July 21, 2019 |website=LFS Forum |access-date=October 13, 2014}} | ||
| + | |{{cite web |url=https://www.lfs.net/forum/post/1949779#post1949779 |title=Scawen's comments on FF Steps and FF Rate (4, thread "OSW and LFS") |date=July 21, 2019 |website=LFS Forum |access-date=October 13, 2014}} | ||
| + | }} | ||
| + | |||
| + | [[Category:Menu]] | ||
<!-- links to other languages --> | <!-- links to other languages --> | ||
Latest revision as of 21:27, 15 December 2024
Audio
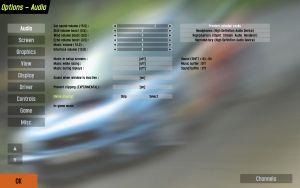
This menu allows you to change the volume of the music and the various sounds.
- Car sound volume:
- Controls volume of all car sounds relative to music and interface sounds. If you experience a crackling engine sound in-game, lower this value. Default since Version S2 X is 15.0.
- Skid volume boost:
- Multiplies the realistic skid volume to make it easier to hear. Set to 0.0 for 'realistic' and 1.0 for the 'boosted' volume level. Default since Version S2 X is 0.5.
- Wind volume boost:
- As above but for wind effects. Note that regardless of this setting, wind noise will be much louder in open topped cars than tin-tops. Default and 'realistic' setting is 0.0. Default since Version S2 X is 0.5.
- Echo volume boost:
- This determines the volume of the echo effect. The default value of 0.0 should be realistic but you can of course alter it to your likings. However, higher values can increase crackling issues. Default since Version S2 X is 0.5.
- Music volume:
- Volume of the menu and the in-game music. Default since Version S2 X is 5.0.
- Interface volume:
- Volume of the interface sounds, like button clicks, etc. Default since Version S2 X is 10.0.
- Music in setup screens: on off
- Switches the music in the setup screens on or off.
- Music while racing: on off
- Switches the music that is played during racing on or off.
- Music during replays: on off
- Switches the music that is played during the replays on or off.
- Sound when window is inactive: on off
- Whether you'd like to hear LFS sounds when you have alt-tabbed out to the Desktop, or have any other application active in the foreground.
- Prevent clipping: on off
- Experimental! Prevents audio clipping.
- Song choice:
- Using the buttons 'Skip' and 'Select' you can choose the song that should be played.
- In-game music:
- LFS supports playlists and here you can see and change which playlist is being used at the moment. Using 'Skip' you can advance one song and using 'Select' you can directly choose a song.
- Channels:
- Using this button you will enter the interface for playlist creation and editing. Channel 1 is the standard for all setup screens and can not be deleted. You can add, rename and delete playlist on the left of the screen. On the right you can add tracks assign a song to each track and delete tracks. To ensure that a track will be played back you have to its priority with 3 being the highest priority, 1 the lowest priority and – the setting to prevent a track from being played. The higher the priority of a song the more likely it is that it is being played back. This means that if you have two song of the same priority you will hear both song equally often but if the one song has a priority of 3 and the other a priority of 1 you will hear the first song much more frequently.
| The music files of LFS are in OGG Vorbis format. You can convert your own music files using a freeware encoder available at www.vorbis.com or using Audacity or a similar audio editor. To play the songs back within LFS they have to be in the data\ogg directory. |
Screen
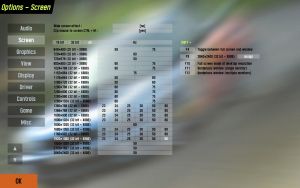
In this menu you can choose the desired resolution, colour depth and refresh rate and assign key commands for different screen configurations.
- Wide screen effect: no yes
- This simulates the effect when watching a movie on a normal 4:3 TV by displaying black bars at the top and the bottom of the screen.
- Clip mouse to screen: no yes
- If you are using LFS in windowed mode, you can leave the LFS window with the mouse pointer. This can be a real problem if you are steering the car with the mouse. This option prevents the mouse pointer from leaving the LFS window. The option can also be enabled and disabled by pressing Ctrl + C.
- Key assign:
- This allows you to assign the resolution, colour depth and refresh rate to one of the four available key commands ⇧ Shift + F9 – ⇧ Shift + F12. Just choose the desired setting and then click on one of the buttons on the right side.
Graphics
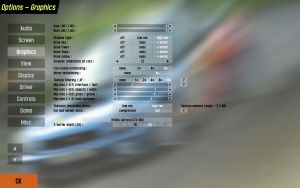
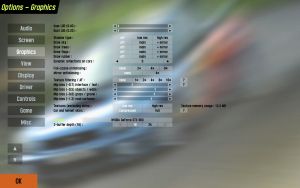
The options in this setup screen allow you to control the graphics quality. Fine tuning of these options can raise the frame rate or improve the image-quality. Turning off some of the options can vastly improve the gaming experience on some computers that are not quite 'up-to-date'.
- User LOD:
- This option influences the 'Level Of Detail' meaning the quality of the objects, textures and the drawing distance. The tyres will, for example, look angularly on a Computer with a low detail level.
- Performance: 0.25 | Quality: 1.00
- Dust LOD:
- This influences the quality of dust as well as smoke.
- Performance: 0.25 | Quality: 1.00
- Shadow type: off low res high res
- Sets the type of shadow used for the cars. 'Off' disables the shadows completely, 'low res' displays shadows, but at a low resolution to increase performance, 'high res' displays full detail shadows. Medium and even (in today's standards) low end systems shouldn't have a problem with the high resolution option.
- Draw sky: off main + mirror
- Sets whether the sky should be drawn or not, and if it is in 16 or 32 bit resolution. Turning the sky off can increase performance on very old systems.
- Draw trees: off main + mirror
- Sets how trees should be rendered. Affects only those trees which would sway if wind is enabled.
- Draw flags: off main + mirror
- Sets if the flags around the track should be rendered. These can be for example used to determine the direction and strength of wind. Has a rather small impact on performance, otherwise the same logic as for the 'Draw trees' option applies.
- Draw rubber: off main + mirror
- Sets if tyre marks should be drawn. Usually has a rather small impact on performance during a normal race, the only exception being if there are lots of tyre marks drawn in a small area, like when doing donuts or burnouts. Same logic as for the 'Draw trees' option applies.
- Dynamic reflections on cars:
- Basically car reflection fidelity. Recommended to set to 12 for maximum quality, if your system can handle it.
- Performance: 0 | Quality: 12
- Full-scene antialiasing: none 2x 4x 8x
- Smooths the jagged edges. Highly recommended if your system can handle it.
- Mirror antialiasing: none 4x
- Smooths the jagged edges in your car mirrors. Highly recommended if your system can handle it.
- Texture filtering / AF: none 1x 2x 4x 8x 16x
- Textures are drawn at various levels of detail, depending on the size they are being drawn on the screen. These levels of detail are called mipmaps. If a texture is drawn smaller (e.g. when an object is further away), a smaller mipmap is used. The texture filtering option affects the way mipmaps are blended. Anisotropic filtering (AF, 2x - 16x) looks best but is expensive to compute, so your framerate will be reduced. If you use AF, you will get better looking results with less negativ mip bias (move mip bias sliders to the right, see next option definition).
- none: bilinear filtering (no blending), only the nearest mipmap is used
- 1x: trilinear filtering, the resulting image is a blend of two nearest mipmaps
- 2x - 16x: anisotropic filtering, reduces blurring of surfaces drawn at oblique angles
- Mip bias ... interface / text:
- Mip bias ... objects / walls:
- Mip bias ... grass / gravel:
- Mip bias ... road surfaces:
- In short, a sort of blurring effect is applied at a distance set by the sliders. Move the slider left for a sharper appearance and to reduce blurring, move it to the right for a smoother appearance and to reduce shimmering. The question mark next to this option explains what these options do in more detail. See thumbnails for samples to see what these sliders do (top left: interface / text, top right: objects / walls, bottom left: grass / gravel, bottom right: road surfaces).
- Textures (excluding skins): low res high res
- Sets if textures should be used in full resolution or downsized. Selecting 'low res' will decrease texture usage considerably and can help increasing performance on older graphics cards.
- Car and helmet skins: compressed full
- Sets whether car and helmet skins should be compressed or left at full quality. Using compression decreases the skin quality, but can greatly increase performance if many cars are on the screen.
- Adapter:
- If you have multiple graphics cards (GPU), you can choose which one to use with LFS. If you change this, you will need to restart LFS to apply.
- Z-Buffer Depth: 15 16 24 32
- Basically sets how big the vertex depth buffer used by the graphics card is. The higher the bit amount, the more depth information can be stored. A lower value means that on distant objects that are close together the graphics card may not be able to discern which object is in front of the other, usually causing a striped texture overlap. Not all buffer depths are available on all graphics cards. The best idea is to simply set it to the highest selectable amount.
View
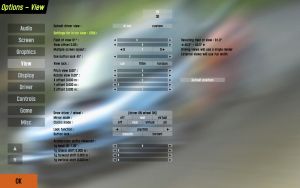
The options in the View category will adjust camera sight in the game. Making a personal preferred setting is recommended as what you see in the game is most important. Let's go through the options available from top to bottom. Note that all view options until 'Acceleration shifts viewpoint' are stored per car, allowing for maximum customizability.
- Default Driver view: In car Custom
- You can have 2 static cameras in-game, either the standard view which is the most realistic, or the custom view which can be placed anywhere. How to set up a custom view will be explained later on. Selecting one of these here will result in that being the standard view which is selected automatically when you start up LFS, at the beginning of races and can be accessed by pressing ⇧ Shift + F1. Select the view here which you will be using most of the time, in car or custom.
- Field of view:
- The width of the view you are presented in game, also known as the amount of zoom. A smaller field of view will result in a closer look at what's in front, but will show less of what's beside you which is also important. A larger field of view will result in good view around you but a distant view what's in front of you. It's up to you to define a balance here, try and adjust the slider till it comforts you. The default value is around 90°.
- View offset:
- View offset
- Multiple screen layout:
- Multiple screen layout
- One button look:
- One button look
- View lock: Car Filter Horizon
- View lock type
- Pitch view:
- The vertical direction of the camera can be selected here, it can aim upwards with a positive value, or it can aim downwards with a negative value.
- Rotate view:
- The horizontal direction of the camera. It can aim left with a negative value or aim right with a positive value.
- Move view with animation: no yes
- This option allows you to select whether the in-car camera moves along with the driver when it steers left and right, which does look realistic, but it's personal whether it should be on or off.
- The mirror offsets:
- Adjusting these will position the front mirror horizontally (mirror offset lateral) and vertically (mirror offset vertical). Make sure it's visible as it's useful tool to notice cars behind you.
- Draw driver / wheel:
- This changes what you see in the in-car view. The driver with the steering wheel, only the steering wheel, or nothing at all. Some people who use a steering wheel in LFS are known to use display no steering wheel in LFS because it looks awkward seeing a steering wheel move the same as the one you are controlling.
- Mirror mode: Off Real Virtual All
- Sets how mirrors are rendered. 'Off' disables mirrors, 'real' shows the image on the car's mirrors, 'virtual' displays a artificial mirror in the top middle of the screen and 'all' combines real and virtual mirror modes.
- Clocks mode: Off Real Virtual All
- This defines how the car's gauges and meters are displayed. 'Off' displays nothing, 'real' shows them on the car's dashboard, 'virtual' shows them on your display and 'all' shows them both on dashboard and display.
- The 'Acceleration shifts viewpoint' options:
- These options define how much the standard view and the custom view is shifted and tilted with the G forces. With all of these options set to 0, the camera remains statically at its position. As a human head and body moves along with G forces applied to it, the head and thus view moves along as well. For a realistic setting, set these options between 0 and 50% of their maximum value.
- Look function: Axis Steer MS X MS XY
- With this option, you can set up additional ways to look left and right beside the look left and right buttons. The Axis option will move the camera left and right with an axis specified in the Controls menu. Read that to get to know how to set an axis for the axis look option. The steer option will move with your steering. Steering left will result in the camera moving left as well. This can be pretty useful as when you steer left, you will want to go in that direction and a view looking into that direction shows more of what to come. The amount the camera looks into the steering direction can be adjusted with Look sensitivity. To find a good value for the sensitivity, steer all the way to one side and adjust the Look sensitivity to what is the maximum allowed amount of movement to one side. Ms X will move the camera left and right along with the mouse. Look sensitivity does the same as described above. Look centre reduction will allow you to define how easily the camera should stay in the forward looking position. Setting it at a high value will result in having to move the mouse a lot to move it out of the forward looking position. At a low value, it will move exactly like the mouse with no centre movement reduction. Ms XY does the same except the camera moves up and down with your mouse as well, making it more adjustable.
- Button look: Smooth Instant
- Setting this option will define how the camera should look left and right when you press the Look left and Look right buttons specified in the Controls menu. Smooth will pan the camera gently to the side when you press the button, instant will show you the side immediately without movement.
Setting up a custom camera
(Note: every custom camera you set up is saved per car. This way you can make a different custom camera in every car.)
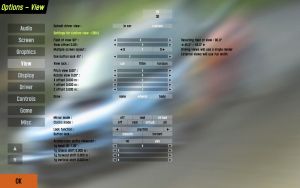
Go to the View options and click on custom in the Default driver view option. Notice that new options are available now called Settings for custom view and have changed a little.
- Draw (main): None Wheels Body
- Sets how the car around you should be drawn. 'None' means nothing is drawn, 'wheels' draws - you probably guessed it - only the wheels and 'body' draws the whole car interior.
- Acceleration shifts viewpoint: off on
- This extra option to turn off the viewpoint shifting under acceleration allows you to have a fixed camera for custom view, while still allowing a moving camera for the in-car view.
- The X offset, Y offset and Z offset:
- The most important settings of a custom view, define the custom camera's position. X offset moves the camera left and right, Y offset moves the camera forwards and backwards and Z offset moves the camera up and down. If you adjust this while the car is on track, two extra buttons will appear, namely 'Centre view' and 'Eye position'. Clicking the former will reset the offsets to 0.0, while pressing the latter will set them to the values similar to what you see in in-car view.
When you are done setting up a custom camera, click in car again in the Default driver view option if you want the default view to be used as the standard view. Though, if you are happy with the new custom view, keep it on custom so it will always be used as the primary view.
View buttons and shortcuts
See more: Keys.
V: Switches through the cameras.
⇧ Shift + V: Switches back through the cameras.
Tab ↹: Switches to the next car.
⇧ Shift + Tab ↹: Switches to the previous car.
HOME: Switches to your own car.
⇧ Shift + F1: Returns to the default view specified in the View options.
⇧ Shift + F: Removes the display showing only graphics and text messages.
⇧ Shift + M: Changes between mirror modes. (No mirrors, only real mirrors or real mirrors + a virtual mirror.)
⇧ Shift + U: Switches to the AutoX editor/Free view -mode.
Display
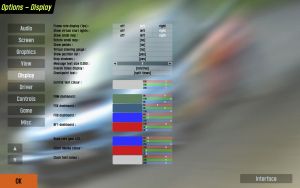
Here we can change the speedo, type of mirror used, add a map of where we are on the track.
- Frame rate display: off left right
- You can choose to have your frame rate (fps) displayed or not, and on which side of the screen.
- Show virtual start lights: off left right
- Sets whether the start lights at the beginning of a race should be displayed in an extra box. This can help when starting from the back of larger fields where the start lights might be hard to see.
- Show small map: off left right
- Controls if the small overview track map should be displayed, and on which side.
- Rotate small map: no yes
- Sets whether the small track map rotates so the triangle of your car always points upwards, or if it is stationary.
- Digital speedo: no yes
- Sets if the speedo is digital or analogue. Note that the speed is measured at the wheels, which means it is not 100% accurate. For example when doing a burnout or when locking the wheels during braking, the speedo can show too high or too low (respectively) values.
- Show pedals: no yes
- Enables or disables the displaying of the virtual 'pedals' in the lower right corner. These can be useful for wheels with calibration problems, so you can see if depressing your pedal fully is also recognized as 100% in-game. A little white bar at the top of the pedal bar signalizes 100% controller input. The colours for the bars are: Green = throttle, Red = brakes, Blue = clutch, Gray = handbrake.
- Virtual steering gauge: no yes
- Turns the virtual steering gauge (white curved bar with a red rectangle showing the current wheel position) at the middle bottom of the screen on or off. Can be useful to determine if the wheel is calibrated correctly.
- Show position list: no yes
- Sets if the driver position list in the lower right corner should be displayed during the race.
- Drop shadows: no yes
- Enables or disables shadows behind the text to improve readability.
- Message text size:
- Adjusts the text displayed in game etc. Default: 0.040
- Overall times display: relative absolute
- Affects the race results display. Sets whether the 'Total' time should be absolute for each driver, or relative to the winner of the race. For example, on 'absolute' setting it would look like this
- AI 1: 3:05.27
AI 2: 3:07.56
AI 3: 3:11.46 - and with 'relative' setting for the same times like this
- AI 1: 3:05.27
AI 2: +0:02.29
AI 3: +0:06.19 - Checkpoint text: split times none
- Enable or disable the on-screen split times appearing when crossing a split/checkpoint line.
- Extra status info: CT (clutch temp) engine fuel accelerometer
- Extra info to show in F9, F10 menus. All four options can be toggled individually.
- Accelerometer: relative absolute
- Data display method for accelerometer in F9 and F10 overlays in-game. Only shown if it is active in the previous option, "Extra status info".
- Manual shift indicator: no yes
- Enables or disables the shift indicator. If enabled, a small red light near the tachometer will light up when the ideal shift point is reached (which is once the next gear would yield more torque than the current gear). Only works on upshifts.
- Various colours:
- Lets you set up a variety of dashboard related colours. Even more colours can be set up in the 'Interface' menu.
- Interface:
- This button opens a new list of options which allow you to control and customise the colours and opacities of the buttons and text used throughout Live for Speed.
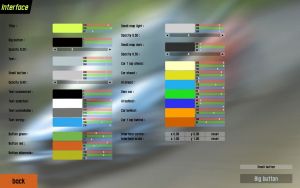
Interface
- Big opacity:
- This controls the opacity (transparency) of the large buttons, e.g. on the main menu.
- Big colour:
- The underlying colour of the main buttons.
- Big text:
- The colour of the text (not affected by opacity).
- Button opacity:
- Affects smaller buttons.
- Button colour:
- Affects smaller buttons.
- Text unselected:
- The colour of text on menus where highlighting occurs (e.g. options or garage).
- Text selected:
- The selected colour of text, as above.
- Text unavailable:
- Visible text that cannot be selected.
- Text string:
- Used on some buttons with user-editable text (like hostname or password), or for example for available but not yet completed training lessons.
- Title colour:
- The colour of the text in the top left of the menus. Also controls highlighting of fastest laps etc in race result lists.
- Button green:
- Shade for 'green' buttons.
- Button red:
- Shade for 'red' buttons.
- Button alternate:
- Shade for buttons used to indicate that pressing the button has no effect, or if an alternate third colour is needed. For example when going to the track selection screen, as long as you don't select a different track than currently loaded, the OK button will have this colour.
- Small map light:
- Colour of the small track map, when drawn against a most likely dark background (used for example at in-car view if the car has a roof).
- Small map dark:
- Colour of the small track map, when drawn against a most likely light background (used for example at in-car view if the car has no roof, or for the TV camera view)
- Car 1 lap ahead:
- Colour of a car more than one lap ahead (on the small track map).
- Car ahead:
- Colour of a car ahead of you.
- AI ahead:
- Colour of an AI car ahead of you.
- Own car:
- Colour of your own car.
- AI behind:
- Colour of an AI car behind you.
- Car behind:
- Colour of a car behind you.
- Car 1 lap behind:
- Colour of a car more than one lap behind you.
Driver
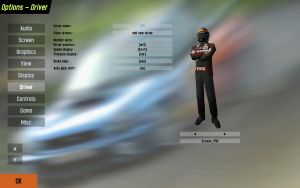
In this menu, details such as screen name, number plate text, etc. can be added. Here you can also select your driver, Male or Female, complete with helmet and racing suit and add to your car’s cockpit. Your selected screen name will always appear next to the player button, and you can also change helmet and helmet colors.
- Brake help: no yes
- Turns brake help on or off. If turned on, a very simple form of ABS tries to help keeping the car under control while braking, but it can increase the overall braking distance.
- Gear shift mode: auto sequential shifter
- Sets the shift mode. 'Auto' makes the computer change gears for you, which is good for beginners, but rather slow. 'Sequential' means you use paddles or a sequential gearstick and 'shifter' should be selected when you use a custom built shifter, or for example the one that comes with the Logitech G25 wheel.
Only available if 'sequential' or 'shifter' are selected:
- Auto clutch: no yes
- Sets if the clutch should be operated automatically during shifting or if you have to do the footwork yourself. If you let the revs drop too low, the engine will stall. BMW Sauber is an exception to this, as it has a computer controlled clutch.
Controls
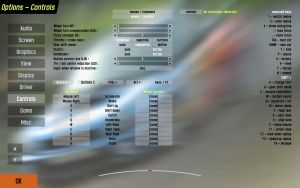
Mouse/Keyboard
- Keyboard steer: Keyboard - no help Keyboard - stabilised Mouse steer
- This is how you select your input method:
- Keyboard - no help: directly translates button presses into wheel movement. So long as the button is held down, the wheel will continue turning until it reaches maximum lock. There is an auto return to centre function when no steering keys are pressed. Both rates are configurable. Also, pressing both left and right will hold the wheel in its current position. This steering method is definitely not recommended, since it is impractically difficult to race with.
- Keyboard - stabilised: has two main differences to "keyboard - no help". Firstly, it limits the movement of the wheel depending on the amount of grip the tyres have. This limit is also adjustable. Secondly it adds a small amount of automatic counter-steering to help balance the car. While this is a driving aid (and the turn limit can be considered one as well), it is essential for using such a basic input device for a task it obviously would never be used to do in real life. Thankfully the keyboard steering is highly configurable in LFS so you should be able to get it to work to your preference.
- Mouse steer: (rather obviously) lets you use the mouse for steering and assign throttle and brake to buttons (be they on your keyboard or your mouse).
- Auto gear shift: yes no
- If enabled, the computer will change gear for you (and probably at the wrong time too).
- Button control rate:
- This is for when you assign a button to an analogue control (e.g. handbrake or clutch) how fast the control moves when the button is pressed. Higher is faster.
Mouse steer only:
- Steer centre reduction:
- This is a non-linearity slider and is designed to make it easier to control the car buy reducing straight line twitchyness. A setting of 0.0 gives fully linear steering whereas a setting of 1.0 gives fully non-linear steering. A setting of 0.4 to 0.6 is recommended.
Keyboard steer only:
- Steer rate:
- The speed the wheel turns when you press the left or right steer buttons. Higher values will make the car more responsive but less stable, and vice versa.
- Return rate:
- The speed the wheel turns when you depress the left or right steer buttons. Higher values will make the car more responsive but less stable, and vice versa. It is usual to use a lower value for the return rate, between 50 to 75% of the steer rate.
- Fast steer multiplier:
- When holding the "Steer Fast" key, the steer rate will be temporarily increased. This slider controls by what percentage it will be increased. With the default setting of 2.00, the steer rate will be doubled. This fast steering option can be useful when quick corrections are needed, such as when counter-steering. Chances are you're going to crash anyway so this option is of limited helpfulness.
- Slow steer multiplier:
- When holding the "Steer Slow" key, the steer rate will be temporarily reduced. This slider controls by what percentage it will be reduced. With the default setting of 0.50, the steer rate will be halved. This slow steering option is most useful at higher speeds when finer control over the vehicle is needed. However the keyboard steering is automatically speed sensitive, so there is really no need to ever use this anyway.
Only available with 'Keyboard - stabilised':
- Limit multiplier:
- A setting of 1.0 limits the wheel turn to that of the available grip of the tyres. Settings higher than this allow you to turn further, to induce understeer. Settings lower than 1.0 means you won't get so close to the limits of the car, so control is retained. The further you reduce this setting, the easier the car will be to drive, at the sacrifice of cornering speed.
In the Buttons 1 subsection you select which button to assign to the function labelled to the right of the button. To choose and lock in your selection, simply click on the button to highlight it, a text message with instructions will appear at bottom of screen, Click desired button or key you wish to associate with this button etc. Do this for all Button 1 selections, then move on to Button 2 section using the same method to select and assign your desired keys or buttons to control the views etc.
When you have completed this, mouse users and keyboard users are finished, and may want to skip the section on wheels and joysticks. And go directly to the far right of this screen and look closely at the various key sequences and what they do. i.e. (Reserved keys) and Shift + combinations.
Wheel/Joystick
This section provides different options additional to the previous section. Existing keyboard and mouse settings can still be used just by clicking on the Mouse/KB button. This is useful if your wheel breaks or springs in pedal fall apart.
After selecting to enable your wheel you will need to set it up for maximum efficiency depending on the make and whether is has force feedback functions etc some options will not be needed or may be used if desired. Please note that you might have to change some settings in the drivers of your wheel manufacturer, e.g. to enable split axes.
- Wheel turn:
- Adjusts the sensitivity of the virtual driver's animation when turning the virtual steering wheel. Set to the actual degrees of rotation of your steering wheel controller for best results.
- For the steering wheel turns for each car, see this page.
- Wheel turn compensation:
- Adjusts the turn ratio of the users wheel to the LFS car.
- Force strength:
- For FF users, higher settings mean more feedback. Just try what suits best to you.
- Throttle/brake axes: combined separate button
- Can be one of three different states:
- Combined: The brake and throttle use the same axis
- Separate: The brake and throttle use one axis each for their settings
- Button: The brake and throttle use can be assigned to a button or a paddle
- Gear shift mode:
- We have discussed earlier the three types and their use.
- Clutch & Handbrake:
- Can be assigned to any spare axis or button if you wish.
- Button control rate:
- Sets the sensitivity of the buttons when mapped to analog inputs. For example, the higher the rate, the faster the handbrake is applied when assigned to a button. Choose Display>Show pedals in order to see this option affect the speed at the which the handbrake (grey bar) is applied.
- Throttle/brake centre reduction:
- Adjusts the sensitivity of the throttle and brake and the point at which it starts to apply.
Axes / FF
This tab allows for assigning functions to your device's axes (see section Setting up the wheel below), and also contains some options for limiting range, force feedback refinement, inversion of axes and toggling of deadzones. Limiting the range of an axis comes handy as a quick solution, when your device reports values that are stuttering (due to a dirty pot), or are not physically reachable at all (on the edge of the full motion range). It could also be useful for simulating a different clutch behaviour.
- Force feedback:
- Main switch to enable or disable force feedback (if supported by your controller device).
- FF Steps:
- Resolution of force feedback (the number of different values that can be used to feed back force). Maximum is 10000, a limit of DirectInput. For low-end wheels with gears/belts, lower values (around 400) are recommended, while for high-end direct drive FF wheels you may wish to go for maximum. This will give you the maximum number of updates from LFS physics, at the maximum resolution allowed by DirectInput. Scawen said: "on lower end wheels (standard wheels with gears or belts) there will not be so much benefit in going for these high update rates and there may be a CPU cost and possibly lag if you go for the full unlimited rate. So I suggest you don't go higher than you need if the difference is not noticeable on your wheel."[1][2][3][4]
- FF Rate:
- Update rate of force feedback, in Hertz. See FF Steps above for more info and recommendations.[1][2][3][4]
- Remove deadzones:
- Remove/ignore deadzones of the controller.
Setting up the wheel
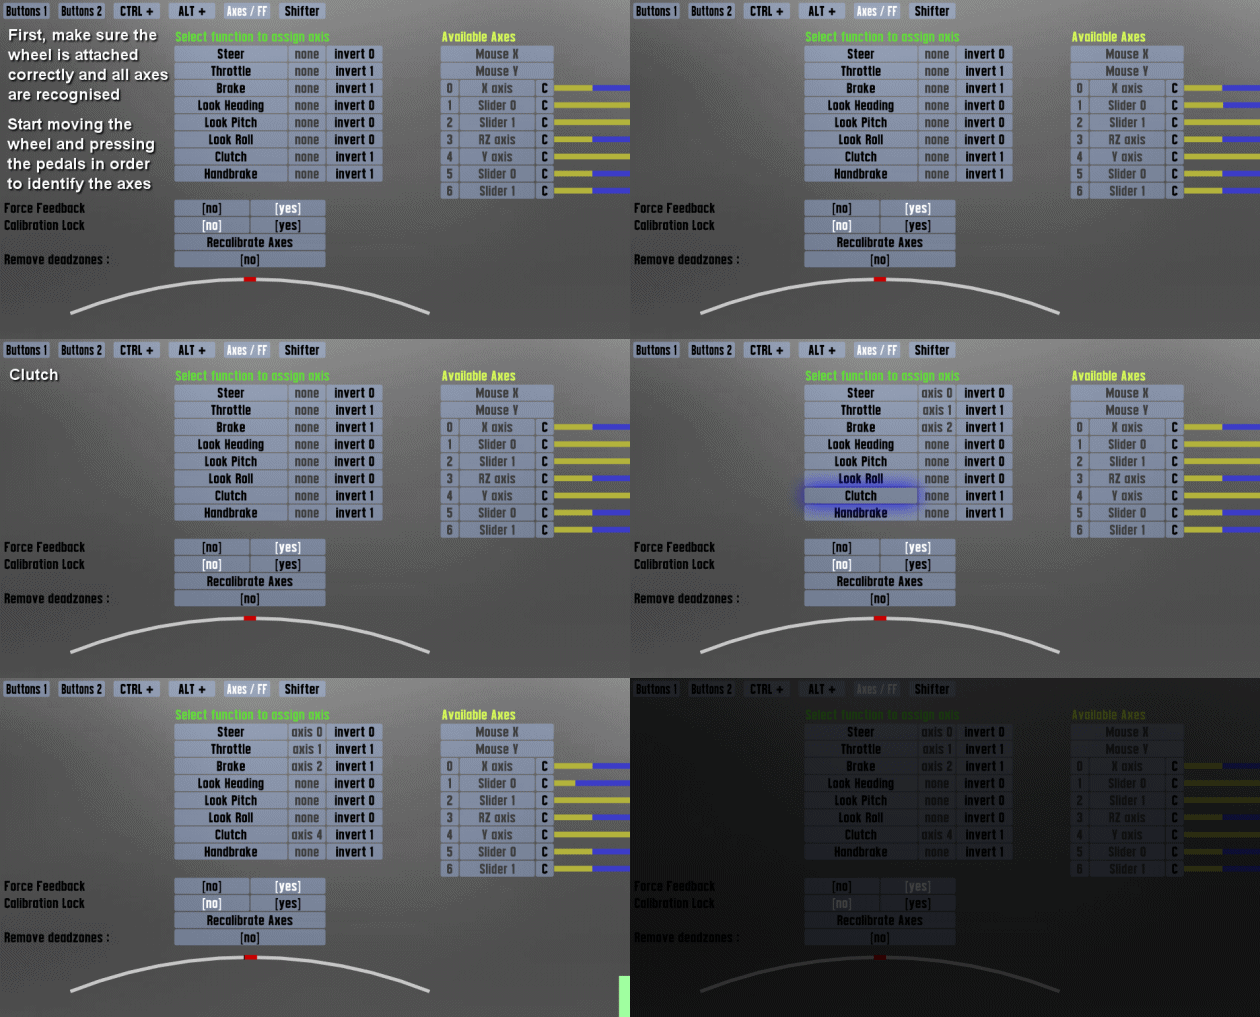
This is the area where wheel and joystick users get to assign the axis. Again most of these options are largely click-and-set buttons.
Please make sure your equipment is attached to the computer and Windows has found the device and it has been set up in Control Panel / Game Controller area. Run your profiler software if needed and deselect combined axis at driver level if necessary (for example: Logitech Profiler). Calibrate using Windows software before attempting to setup in LFS. It is essential you have the latest wheel drivers and DirectX version installed, or the wheel might not work properly.
- Set throttle and brake axes to separate, or combined if your wheel doesn't support the former
- (You may have to change this setting in the wheel software, too! See the "Before you start" section)

- In the middle of the screen a list of functions, and on the right a list of available axes will show up. Start rotating the wheel and pressing the pedals on your controller. If everything has been set up correctly so far, the blue/yellow bars on the far right will begin to move, representing the current controller input. If this is NOT the case, the fault is somewhere outside of LFS - see the "Before you start" section above.
- With the axes list still open, you can now start assigning the different functions to the available axes. To do this, first click on the function you want to assign (e.g. "Steer"), then click on the axis you want to assign it to (e.g. "X axis"). Unlike in many other games, pressing the pedal or rotating the wheel after clicking on the function button will NOT assign the axis automatically!
- After all necessary functions have been assigned, check if LFS reads the input correctly by rotating the wheel and pressing the pedals again. Now the steering indicator and pedal bars will move, too. If an axis/function operates the opposite way it should, click on the "invert" button found to the right of the function in question. If, for some reason you need to limit the range of some axes, you can do so by adjusting the range values (0-100% for both range ends).
Setting up clutch & H-Shifter
- Set up wheel as described above. Assign clutch to seperate axis as you did with throttle and brake.
- In Options - Controlls: set Gear shift mode: shifter
- In Options - Controlls: go to Shifter tab and assign all gears.
- Click gear button in list then shift into that on shifter.
- When done, go through all gears again: If you did it correctly then the button of engaged gear lights up.
- In Options - Driver: Set Gear shift mode: shifter, too. In same menu set Auto-Clutch: No
Click for a screenshot compilation of all the above options
How to shift gears:
- Press clutch
- move shifter to new gear
- Lift foot of clutch
If you can shift gears in the Options menu but not in the car, then you are not pressing the clutch far enough.
Game
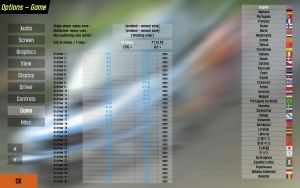
Here we set some minor options such as the automatic/manual saving of races, the finishing order for race restarts etc - We can substitute names for the AI, maybe we want to race against Peter Brock or Michael Schumacher? Just click to cycle through the available options of each selection. The most important feature however, is the ability to add to the F1 - F8 keys of your own custom messages, such as “Sorry”, Hello, etc for use when in game and too busy to type a reply etc. To do this, select the "F1 to F8" button and in the space next to the selected key, click to open, then type in your message text, click OK to save. There is a limit on length etc, but most short messages can be written.
On the right side of this page you can select the language used in LFS.
- Single player replay save: Not enabled - not stored Enabled - manual save Auto save
- Sets how replays should be handled. Not enabled means there are no replays recorded, ever. Enabled means replays are recorded, but you have to save them manually (ingame, hit "1" to save with automatically generated name, or hit "2" to save with custom name). Automatic means that every replay is saved with an automatically generated name, without requiring you to do anything (be aware, this might fill up your system storage over time).
- Multiplayer replay save: Not enabled - not stored Enabled - manual save Auto save
- See single player replay save.
- Non-qualifying race restart: Finishing order Reverse finishing order Fixed order Random
- Sets how race (re)starts that had no prior qualifying should be handled. The options are self explanatory.
- Edit AI names / F keys:
- AI names: Self explanatory.
- F1 to F8: Click on the spaces/buttons right to the desired key to define the text to say on hitting the corresponding key. The codes in there are the same as if hitting "T" (to talk) ingame.
- CTRL +: Same as behaviour as in "F1 to F8", but defines the actions when hitting CTRL plus the desired key at the same time. Additionally you have access to keys F9 - F12 here.
- ALT +: See 'CTRL +', but instead with the ALT key.
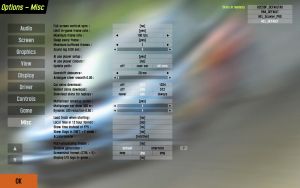
Misc
There are twenty different options here! Including some things that make a difference to game play and frame rates.
- Full screen vertical sync: yes no
- Turns VSync on or off.
- Limit frame rate in game: yes no
- This is used in conjunction with the next option to set what max frame rate to use.
- Maximum frame rate:
- Here you can set a minimum / maximum number of frames for use in game – depends upon the previous setting to enable/disable.
- Minimum sleep:
- This setting forces LFS to sleep/wait the set amount of time between each frame, to allow Windows to update controller inputs, etc. Increase this value if you're having problems with controller stuttering/lag or similar. Don't put it too high, though, as it will also limit your maximum framerate.
- Sound lag:
- Because the program has to play the sound slightly in advance, so that there are no gaps in the sound. Recommended setting is as low as possible without hearing stutters or gaps in the sound.
- AI use player setup: yes no
- Whether you allow AI cars to use your personal car setups.
- AI use player colours: yes no
- Whether you allow AI cars to use your personal car skins (colours).
- Update path: off user car all cars
- This determines which cars update the racing groove on the track.
- Gearshift debounce:
- Sets the time in milliseconds that must elapse before another (sequential) gear change is accepted. On some wheels when they get old, the paddles start to sometimes report two very quick presses instead of one. This setting tries to cure the annoying behaviour by ignoring quick shift commands. If you suffer from these so called double shifts, increase this value - if on the other hand you seem to miss gear shifts when quickly shifting yourself, decrease it.
- Analogue steer smooth:
- Sets the amount of smoothing for joysticks and some wheels. The higher the value, the smoother your inputs will be, but they will also lag behind slightly.
- Car skins download: off 512 1024
- Controls the automatic downloading of car skins for licensed users. The 1024 option requires you to have money credits on your Live For Speed account, and costs £1 for 2000 'hi-res' skins. If you run out of credit LFS will give a warning message, and then stop downloading skins. It will not resort to 512 mode. Default: 512
- Helmet skins download: off 256 512
- Controls the automatic downloading of helmet skins for licensed users. The 512 option requires you to have money credits on your Live For Speed account, and costs £1 for 2000 'hi-res' skins. If you run out of credit LFS will give a warning message, and then stop downloading skins. It will not resort to 256 mode. Default: 256
- Download skins for replays: never ask always
- Sets whether the program will never download skins in replay files, will prompt if you do not have the skin, or always download missing skins automatically. Default: Ask
- Multiplayer speedup option: yes no
- This option makes the distant cars use less CPU power by not updating their physics or drawing them at all. If you have no performance issues online, leave this disabled.
- Multiplayer car draw:
- Sets the distance the cars are drawn. Use a lower value for better performance. Only visible when 'Multiplayer speedup option' is enabled.
- Dynamic LOD reduction:
- Sets the value for the dynamic change of "Level of Detail". Zero means no, and one is full dynamic LOD reduction. This makes the Level of Detail change dynamically depending on how many cars are visible and on your current framerate. Use higher values if you experience slowdowns when multiple cars are visible.
- Performance: 1.00 | Quality: 0.00
- Full physics for remote cars: yes no
- If enabled, all cars on track will use high-resolution physics. This is helpful to eliminate little stutters in car movement when a lot of cars are shown. On the other hand, this doubles CPU usage by physics in multiplayer! If you have low FPS and generally a weaker computer, disable this. If disabled, only the nearest four cars use full physics on your screen. Introduced in 0.7D7/0.7E.
- Performance: no | Quality: yes
- Load track when starting: yes no
- If disabled, the startup time of LFS will be considerably decreased.
- Local time in 12 hour format: yes no
- If enabled, local time 14:38 appears as 2:38.
- Show time instead of FPS: yes no
- If on, the FPS display (see Options - Display) will be replaced with the local time.
- Show flags in SHIFT+F mode: yes no
- If enabled, blue and yellow flags are still displayed if the interface rendering has been disabled with ⇧ Shift + F.
- Allow regional downloads: yes no
- When enabled, you will be redirected to the nearest LFS server to downloads vehicle mods from. Otherwise if disabled, downloads will be retrieved only from the main LFS server (may take longer). Allowing regional downloads should make downloads faster, but if you experience any problems/errors when using mods, try disabling this.
- Post-processing shader: yes no
- If enabled, the ps_main shader in data\shaders\PostProcess.psh is used to create the final image. The post-processing shader is set to S-SHAPE by default. At first glance, it looks like the setting just increases the contrast, when in fact it's just a placeholder "demo" for a shader, located in data\shaders\PostProcess.psh and there are more examples in that file. You are supposed to create your own shader to use with LFS. Only enable if you know what you are doing (by default, this is NOT an option for maxing out graphics settings). While enabling the default placeholder shader might make the LFS have more contrast and you might like it, LFS is not meant to look like that by default.
- Shadow generation: default alternative
- These options produce the same result in a different way. It is best to choose the option that results in the highest framerate when many shadows are visible, for example a full starting grid. As usual for graphics frame rate tests, you should pause LFS to avoid physics and sound CPU usage.
- Screenshot format (CTRL+S): bmp jpg png
- When you press Ctrl + S, a screenshot is saved to data\shots. You define the screenshot file format here, PNG recommended. BMP usually results in a much higher file size with high quality, JPG compresses the image a bit to save space sacrificing quality, PNG is lossless but with a usually smaller file size than BMP.
- Display LFS logo in-game: yes no
- Enable or disable the LFS logo in the top left corner of the screen. You can only disable it if you are S1 licensed or higher.
External links
- Custom music in LFS guide at RSC forums
References
- ^ "Scawen's comments on FF Steps and FF Rate (1, thread "Test Patch U16: Updates and fixes")". LFS Forum. July 21, 2019. Retrieved October 13, 2014.
- ^ "Scawen's comments on FF Steps and FF Rate (2, thread "LFS Mods [TEST VERSION Introduction and Discussion")"]. LFS Forum. December 9, 2021. Retrieved October 13, 2014.
- ^ "Scawen's comments on FF Steps and FF Rate (3, thread "OSW notchy FFB")". LFS Forum. July 21, 2019. Retrieved October 13, 2014.
- ^ "Scawen's comments on FF Steps and FF Rate (4, thread "OSW and LFS")". LFS Forum. July 21, 2019. Retrieved October 13, 2014.
