LFS Editor/Quick Start
| This page or section is being initially created, or is in the process of an expansion or major restructuring. You are welcome to assist in its construction by editing it. |
| LFS Editor | |
|---|---|
|
|
| Vehicle Mods |
This is a quick start guide how to install LFS Editor and create a mod based on an existing LFS car, test it in LFS and upload it to www.lfs.net.
Install LFS Editor
- 1 Download LFS_EDITOR_7E_setup.exe.
You can find the latest version on www.lfs.net - Additional Downloads section.
- 2 Run the installer and follow the instructions.
LFS Editor will be installed in C:\LFS_EDITOR by default.
- 3 Open LFS_EDITOR.exe from the installation directory.
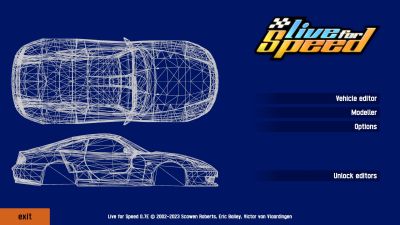
You will see the following screen:
- 4 Click Unlock editors to unlock the LFS Editor with your LFS username and game password.
To unlock the editor, you need to be registered on the official website and you must own an S3 license. If you do not have an S3 license yet, you can buy it on the official shop page.
Load a vehicle
You can load an existing LFS car from the Vehicle Editor.
- 1 Click Vehicle Editor on the LFS Editor entry screen to open the Vehicle Editor.
- 2 In the bottom right corner, click LOAD. A dialog with a title "Enter name of vehicle to LOAD" will appear.
- 3 Select one of the default LFS cars, for example UF 1000 and click OK.
In the Vehicle Editor, you can adjust various settings of the vehicle mod, such as wheels, suspension, engine, lights, dashboard, mass distribution and more. You can also go to the Modeller to see the triangles, points or texture pages.
