Difference between revisions of "LFS Editor/Modeller/Texture Mapping Mode"
From LFS Manual
< LFS Editor | Modeller
Jump to navigationJump to search (Added the 3rd part containing Making a Mapping) |
|||
| Line 10: | Line 10: | ||
| Open the [[../|modeller]]. | | Open the [[../|modeller]]. | ||
| Click the {{old button|map}} button at the top left or press {{key press|5}}. | | Click the {{old button|map}} button at the top left or press {{key press|5}}. | ||
| − | + | ||
[[Image:LFS Editor map mode.jpg|thumb|none|Texture mapping mode in modeller]] | [[Image:LFS Editor map mode.jpg|thumb|none|Texture mapping mode in modeller]] | ||
| + | |||
| + | | Adding a mapping <br/> | ||
| + | To add a mapping, you need to be in '''2D''' View, here's a list of 2D view shortcuts: <br/> | ||
| + | |||
| + | For Front view press {{key press|F}}. <br/> | ||
| + | |||
| + | For Right view press {{key press|R}}. <br/> | ||
| + | |||
| + | For Left view press {{key press|L}}. <br/> | ||
| + | |||
| + | For Top view press {{key press|T}}. <br/> | ||
| + | |||
| + | For Buttom/Under view press {{key press|U}}. <br/> | ||
| + | <br/> | ||
| + | |||
| + | Now simply hold {{key press|RMB}} and drag to make a box, that box will be the new mapping borders although it can be adjusted later. <br/> | ||
| + | |||
| + | A new button should appear as {{Old button|Make New Mapping |palegreen}}, give the mapping a name. | ||
| + | <br/> | ||
| + | <br/> | ||
| + | Every mapping need to be assigned to a '''Cutout''', to assign the mapping to use the cutout, {{key press|LMB}} on the {{Old button|Cutout|grey}} field beside the {{Old button|Your Mapping Name|lightgrey}} | ||
| + | |||
| + | Then {{key press|LMB}} on the Cutout name. | ||
| + | }} | ||
[[Category:Modeller|{{SUBPAGENAME}}]] | [[Category:Modeller|{{SUBPAGENAME}}]] | ||
Revision as of 18:46, 1 February 2025
This article is a stub. You can help LFS Manual by expanding it.
| LFS Editor | |
|---|---|
|
|
| Vehicle Mods |
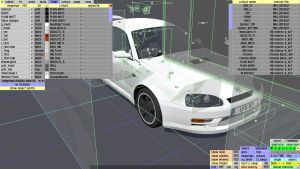
Texture mapping mode (or map mode) is a editing mode in the modeller, a part of the LFS Editor. In this mode, cutouts of texture pages are mapped onto the 3D model's triangles using a planar projection.
Entering the texture mapping mode
- 1 Open the modeller.
- 2 Click the map button at the top left or press 5.
- 3 Adding a mapping
To add a mapping, you need to be in 2D View, here's a list of 2D view shortcuts:
For Front view press F.
For Right view press R.
For Left view press L.
For Top view press T.
For Buttom/Under view press U.
Now simply hold RMB and drag to make a box, that box will be the new mapping borders although it can be adjusted later.
A new button should appear as Make New Mapping , give the mapping a name.
Every mapping need to be assigned to a Cutout, to assign the mapping to use the cutout, LMB on the Cutout field beside the Your Mapping Name Then LMB on the Cutout name.
