Difference between revisions of "LFS Editor/Options"
From LFS Manual
Jump to navigationJump to searchm (add infobox) |
m |
||
| (7 intermediate revisions by the same user not shown) | |||
| Line 1: | Line 1: | ||
| − | + | {{Infobox LFS Editor}} | |
| − | {{ | + | The '''[[LFS Editor]] options''' screen can be accessed by clicking the {{button|Options}} button on the editor entry screen or by pressing {{key press|Shift|O}} at any point in the editor. |
== Screen == | == Screen == | ||
| Line 9: | Line 9: | ||
In this menu you can choose the output device, change the desired resolution, refresh rate and assign key commands for different screen configurations. | In this menu you can choose the output device, change the desired resolution, refresh rate and assign key commands for different screen configurations. | ||
| − | + | ;Adapter | |
| − | + | :If your computer uses multiple graphics adapters (for example an integrated and a dedicated graphics card), this setting becomes available. It controls which graphics adapter is responsible for rendering the program. | |
| − | If your computer uses multiple graphics adapters (for example an integrated and a dedicated graphics card), this setting becomes available. It controls which graphics adapter is responsible for rendering the program. | + | :If you have only one graphics adapter, its name will be shown at the top of the settings screen. |
| − | + | ;Output | |
| − | If you have only one graphics adapter, its name will be shown at the top of the settings screen. | + | :If you use multiple monitors, you can switch between them by clicking the currently selected display button. |
| − | + | : If you use a single monitor, this option is hidden. | |
| − | + | ;Wide screen effect | |
| − | + | :This simulates the effect when watching a movie on a normal 4:3 TV by displaying black bars at the top and the bottom of the screen. | |
| − | If you use multiple monitors, you can switch between them by clicking the currently selected display button. | + | ;Clip mouse to screen / window CTRL + M |
| − | + | :If you are using the LFS Editor in windowed mode, you can leave the editor window with the mouse pointer. This option prevents the mouse pointer from leaving the editor window. The option can also be enabled and disabled by pressing {{key press|Ctrl|M}}. | |
| − | If you use a single monitor, this option is hidden. | + | ;SHIFT + function key assignments |
| − | + | :On the right side, there are several screen mode assigned to {{key press|Shift|Fn}} keys. | |
| − | + | :* {{key press|Shift|F4}} - toggle between full screen and window | |
| − | + | :* {{key press|Shift|F10}} - full screen mode at desktop resolution | |
| − | This simulates the effect when watching a movie on a normal 4:3 TV by displaying black bars at the top and the bottom of the screen. | + | :* {{key press|Shift|F11}} - borderless window (single monitor) |
| − | + | :* {{key press|Shift|F12}} - borderless window (multiple monitors) | |
| − | + | :You can also assign the resolution, colour depth and refresh rate to {{key press|Shift|F9}}. Just choose the desired setting and then click the {{button|assign}} on the right side. | |
| − | |||
| − | If you are using the LFS Editor in windowed mode, you can leave the editor window with the mouse pointer. This option prevents the mouse pointer from leaving the editor window. The option can also be enabled and disabled by pressing {{key press|Ctrl|M}}. | ||
| − | |||
| − | |||
| − | |||
| − | On the right side, there are several screen mode assigned to {{key press|Shift|Fn}} keys. | ||
| − | |||
| − | * {{key press|Shift|F4}} - toggle between full screen and window | ||
| − | * {{key press|Shift|F10}} - full screen mode at desktop resolution | ||
| − | * {{key press|Shift|F11}} - borderless window (single monitor) | ||
| − | * {{key press|Shift|F12}} - borderless window (multiple monitors) | ||
| − | |||
| − | You can also assign the resolution, colour depth and refresh rate to {{key press|Shift|F9}}. Just choose the desired setting and then click the {{button|assign}} on the right side. | ||
== Driver == | == Driver == | ||
| Line 46: | Line 33: | ||
In this menu, details such as screen name, number plate text, etc. can be added. Here you can also select your driver, Male or Female, complete with helmet and racing suit and add to your vehicle mod's cockpit. | In this menu, details such as screen name, number plate text, etc. can be added. Here you can also select your driver, Male or Female, complete with helmet and racing suit and add to your vehicle mod's cockpit. | ||
| − | + | ;Number plate | |
| − | + | :The text will appear on your vehicle mod's number plate if it uses them. | |
| − | The text will appear on your vehicle mod's number plate if it uses them. | + | ;Speed display |
| − | + | :You can choose which units will be used on your vehicle mod's speedo gauge. You can choose between km/h and mph. | |
| − | + | :{{tip|small=yes|This setting does not affect the units shown in LFS. Each player can set their own units in [[Options#Driver|LFS driver options]].}} | |
| − | + | ;Pressure display | |
| − | You can choose which units will be used on your vehicle mod's speedo gauge. You can choose between km/h and mph. | + | :This setting controls the units used to display tyre pressures of your vehicle mod in the car setup section. You can choose between bar and psi. |
| − | |||
| − | {{tip|This setting does not affect the units shown in LFS. Each player can set their own units in [[Options#Driver|LFS driver options]].}} | ||
| − | |||
| − | |||
| − | |||
| − | This setting controls the units used to display tyre pressures of your vehicle mod in the car setup section. You can choose between bar and psi. | ||
== Misc == | == Misc == | ||
| Line 64: | Line 45: | ||
[[Image:LFS Editor - Options - Misc.jpg|thumb|Misc options]] | [[Image:LFS Editor - Options - Misc.jpg|thumb|Misc options]] | ||
| − | + | ;Full screen vertical sync | |
| − | + | :Turns [http://en.wikipedia.org/wiki/Vsync Vsync] on or off. | |
| − | Turns [http://en.wikipedia.org/wiki/Vsync Vsync] on or off. | + | ;Limit in-game frame rate |
| − | + | :This is used in conjunction with the next option to set what max frame rate to use. | |
| − | + | ;Maximum frame rate | |
| − | + | :Here you can set a minimum / maximum number of frames for use in the editor – depends upon the previous setting to enable/disable. | |
| − | This is used in conjunction with the next option to set what max frame rate to use. | + | ;Sleep every frame |
| − | + | :This setting forces the LFS Editor to sleep/wait a set amount of time between each frame, to allow Windows to update controller inputs, etc. | |
| − | + | ;Screenshot format (CTRL + S) | |
| − | + | :This sets the file format of screenshots taken in the editor by pressing {{key press|Ctrl|S}}. You can choose between bmp, jpg, png, tif, for gif. | |
| − | Here you can set a minimum / maximum number of frames for use in the editor – depends upon the previous setting to enable/disable. | + | ;Skins in memory |
| − | + | :On the right side, there is a list of all car skins currently cached in the computer memory. | |
| − | |||
| − | |||
| − | This setting forces the LFS Editor to sleep/wait a set amount of time between each frame, to allow Windows to update controller inputs, etc. | ||
| − | |||
| − | |||
| − | |||
| − | This sets the file format of screenshots taken in the editor by pressing {{key press|Ctrl|S}}. You can choose between bmp, jpg, png, tif, for gif. | ||
| − | |||
| − | |||
| − | |||
| − | On the right side, there is a list of all car skins currently cached in the computer memory. | ||
== Editor == | == Editor == | ||
| Line 92: | Line 62: | ||
[[Image:LFS Editor - Options - Editor.jpg|thumb|Editor options]] | [[Image:LFS Editor - Options - Editor.jpg|thumb|Editor options]] | ||
| − | + | ;Editor FOV | |
| − | + | : {{see also|../User Interface#Field of view (zoom)}} | |
| − | {{see also| | + | : The width of the view you are presented in the editor, also known as the amount of zoom. The default value is 80°. |
| − | + | ;Invert left + right rotate | |
| − | The width of the view you are presented in the editor, also known as the amount of zoom. The default value is 80°. | + | :This setting controls the behaviour of the editor's [[../User Interface#Orbit|orbit view]] feature, which rotates around a point while {{key press|LMB|RMB}} are pressed and moving your mouse around. |
| − | + | ;Invert right button look | |
| − | + | :This setting controls the behaviour of the editor's [[../User Interface#Look around|look around]] view feature, which rotates the view around the current viewpoint when pressing and holding {{key press|RMB}}. | |
| − | + | :* {{button|[no]|light}} - the view will rotate in the opposite direction of your mouse | |
| − | This setting controls the behaviour of the editor's [[ | + | :* {{button|[yes]|light}} - the view will follow the direction of dragging your mouse |
| − | + | ;Environment colours | |
| − | + | :There is a set of buttons to customize the colours of the editor's graphical environment. | |
| − | + | :;Texture | |
| − | This setting controls the behaviour of the editor's [[ | + | ::Controls the colour tint of the [[../Guides/Modeller Background Images|background images]] loaded in the [[Modeller]]. |
| − | + | :;Sun | |
| − | * {{button|[no]|light}} - the view will rotate in the opposite direction of your mouse | + | ::Controls the colour of the sun, which affects the environment lighting tint. |
| − | * {{button|[yes]|light}} - the view will follow the direction of dragging your mouse | + | :;Sky |
| − | + | ::Controls the colour of the sky, which affects the environment lighting tint. | |
| − | + | :;Ground | |
| − | + | ::Controls the colour of the plain texture of the ground. The default value is grey. | |
| − | There is a set of buttons to customize the colours of the editor's graphical environment. | + | ;Compressed textures |
| − | + | :Sets whether the vehicle mod's textures should be compressed (DDS format) or left at full quality (PNG format). | |
| − | + | ;Blob size | |
| − | + | :{{see also|../User Interface#Text and button sizes}} | |
| − | + | :Adjusts the size of the point selection buttons in the editor. | |
| − | + | ;Text size | |
| − | + | :{{see also|../User Interface#Text and button sizes}} | |
| − | + | :Adjusts the font size of all editor text. | |
| − | Controls the colour of the sun, which affects the environment lighting tint. | ||
| − | |||
| − | |||
| − | |||
| − | Controls the colour of the sky, which affects the environment lighting tint. | ||
| − | |||
| − | |||
| − | |||
| − | Controls the colour of the plain texture of the ground. The default value is grey. | ||
| − | |||
| − | |||
| − | |||
| − | Sets whether the vehicle mod's textures should be compressed (DDS format) or left at full quality (PNG format). | ||
| − | |||
| − | |||
| − | |||
| − | {{see also| | ||
| − | |||
| − | Adjusts the size of the point selection buttons in the editor. | ||
| − | |||
| − | |||
| − | |||
| − | {{see also| | ||
| − | + | [[Category:LFS Editor|{{SUBPAGENAME}}]] | |
Latest revision as of 21:41, 7 February 2024
| LFS Editor | |
|---|---|
|
|
| Vehicle Mods |
The LFS Editor options screen can be accessed by clicking the Options button on the editor entry screen or by pressing ⇧ Shift + O at any point in the editor.
Screen
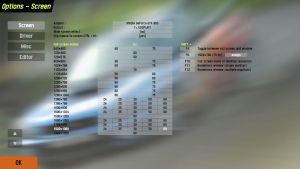
In this menu you can choose the output device, change the desired resolution, refresh rate and assign key commands for different screen configurations.
- Adapter
- If your computer uses multiple graphics adapters (for example an integrated and a dedicated graphics card), this setting becomes available. It controls which graphics adapter is responsible for rendering the program.
- If you have only one graphics adapter, its name will be shown at the top of the settings screen.
- Output
- If you use multiple monitors, you can switch between them by clicking the currently selected display button.
- If you use a single monitor, this option is hidden.
- Wide screen effect
- This simulates the effect when watching a movie on a normal 4:3 TV by displaying black bars at the top and the bottom of the screen.
- Clip mouse to screen / window CTRL + M
- If you are using the LFS Editor in windowed mode, you can leave the editor window with the mouse pointer. This option prevents the mouse pointer from leaving the editor window. The option can also be enabled and disabled by pressing Ctrl + M.
- SHIFT + function key assignments
- On the right side, there are several screen mode assigned to ⇧ Shift + Fn keys.
- ⇧ Shift + F4 - toggle between full screen and window
- ⇧ Shift + F10 - full screen mode at desktop resolution
- ⇧ Shift + F11 - borderless window (single monitor)
- ⇧ Shift + F12 - borderless window (multiple monitors)
- You can also assign the resolution, colour depth and refresh rate to ⇧ Shift + F9. Just choose the desired setting and then click the assign on the right side.
Driver
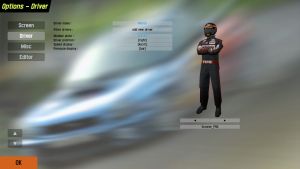
In this menu, details such as screen name, number plate text, etc. can be added. Here you can also select your driver, Male or Female, complete with helmet and racing suit and add to your vehicle mod's cockpit.
- Number plate
- The text will appear on your vehicle mod's number plate if it uses them.
- Speed display
- You can choose which units will be used on your vehicle mod's speedo gauge. You can choose between km/h and mph.
| This setting does not affect the units shown in LFS. Each player can set their own units in LFS driver options. |
- Pressure display
- This setting controls the units used to display tyre pressures of your vehicle mod in the car setup section. You can choose between bar and psi.
Misc
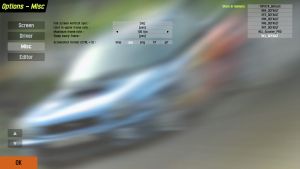
- Full screen vertical sync
- Turns Vsync on or off.
- Limit in-game frame rate
- This is used in conjunction with the next option to set what max frame rate to use.
- Maximum frame rate
- Here you can set a minimum / maximum number of frames for use in the editor – depends upon the previous setting to enable/disable.
- Sleep every frame
- This setting forces the LFS Editor to sleep/wait a set amount of time between each frame, to allow Windows to update controller inputs, etc.
- Screenshot format (CTRL + S)
- This sets the file format of screenshots taken in the editor by pressing Ctrl + S. You can choose between bmp, jpg, png, tif, for gif.
- Skins in memory
- On the right side, there is a list of all car skins currently cached in the computer memory.
Editor
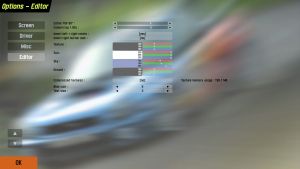
- Editor FOV
- The width of the view you are presented in the editor, also known as the amount of zoom. The default value is 80°.
- Invert left + right rotate
- This setting controls the behaviour of the editor's orbit view feature, which rotates around a point while LMB + RMB are pressed and moving your mouse around.
- Invert right button look
- This setting controls the behaviour of the editor's look around view feature, which rotates the view around the current viewpoint when pressing and holding RMB.
- [no] - the view will rotate in the opposite direction of your mouse
- [yes] - the view will follow the direction of dragging your mouse
- Environment colours
- There is a set of buttons to customize the colours of the editor's graphical environment.
- Texture
- Controls the colour tint of the background images loaded in the Modeller.
- Sun
- Controls the colour of the sun, which affects the environment lighting tint.
- Sky
- Controls the colour of the sky, which affects the environment lighting tint.
- Ground
- Controls the colour of the plain texture of the ground. The default value is grey.
- Compressed textures
- Sets whether the vehicle mod's textures should be compressed (DDS format) or left at full quality (PNG format).
- Blob size
- Adjusts the size of the point selection buttons in the editor.
- Text size
- Adjusts the font size of all editor text.


